
What Is a Robots.txt File?
A robots.txt file is a set of instructions telling search engines which pages should and shouldn’t be crawled on a website. Which guides crawler access but shouldn’t be used to keep pages out of Google's index.
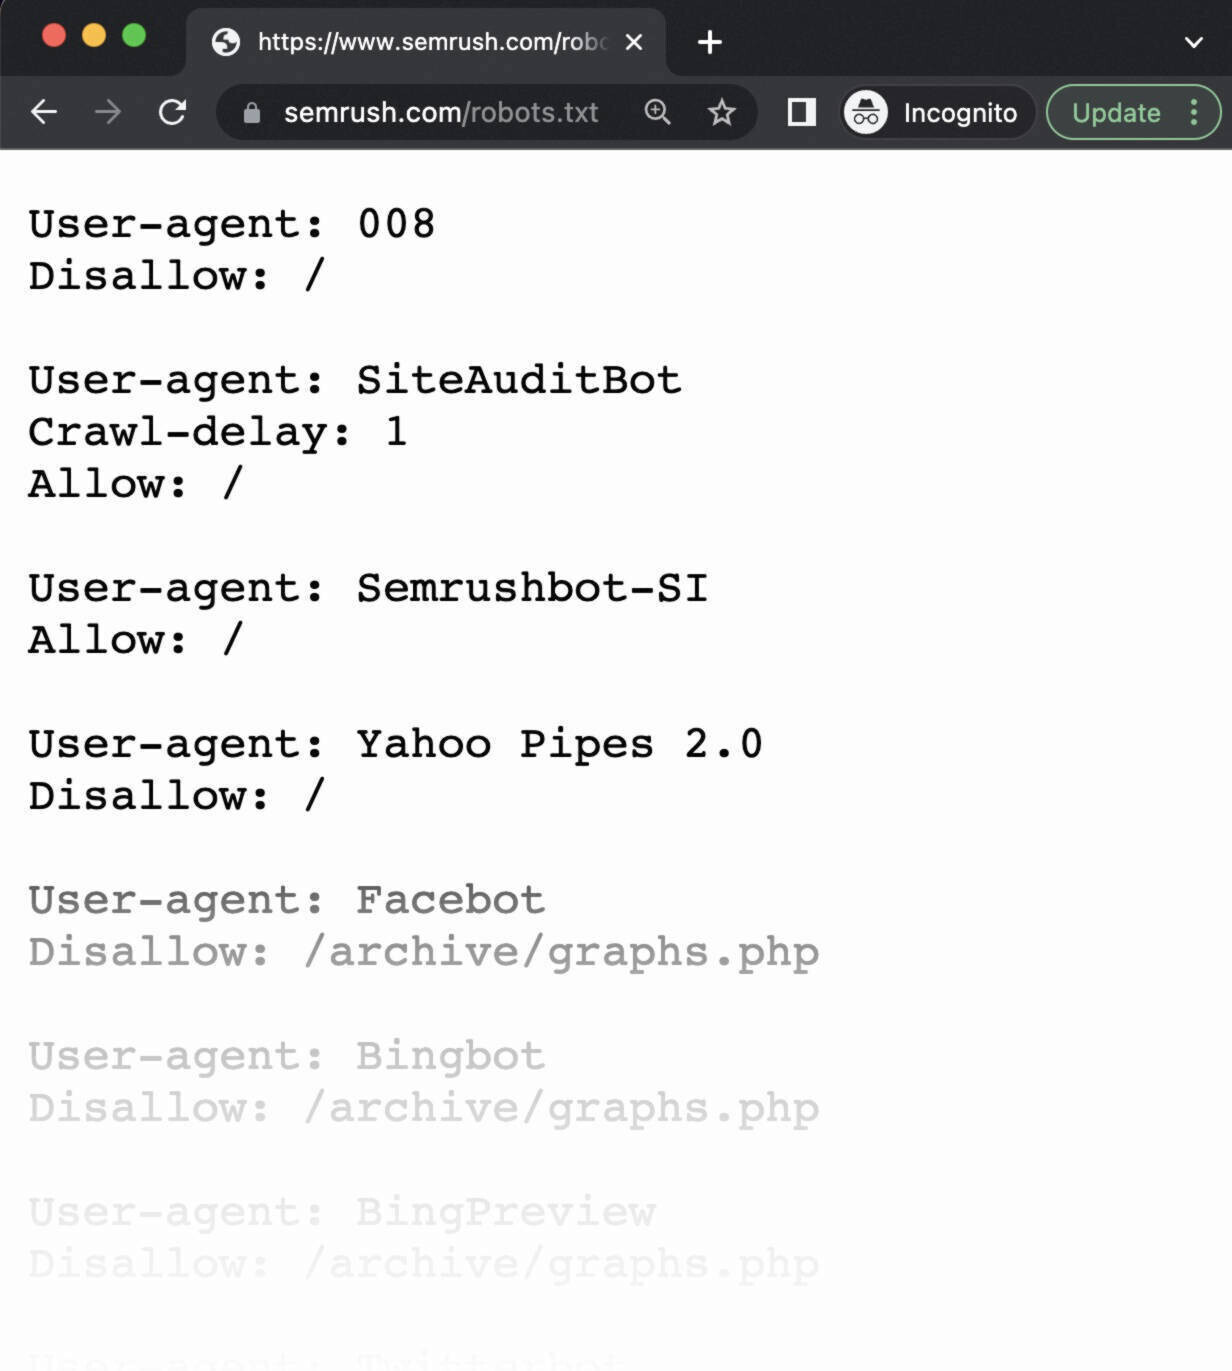
A robots.txt file looks like this:
Robots.txt files might seem complicated, but the syntax (computer language) is straightforward.
Before we get into those details, let’s offer some clarification on how robots.txt differs from some terms that sound similar.
Robots.txt vs. Meta Robots vs. X-Robots
Robots.txt files, meta robots tags, and x-robots tags all guide search engines about how to handle your site’s content.
But they differ in their level of control, where they’re located, and what they control.
Here are the specifics:
- Robots.txt: This file is located in your website's root directory and acts as a gatekeeper to provide general, site-wide instructions to search engine crawlers on which areas of your site they should and shouldn’t crawl
- Meta robots tags: These are snippets of code that reside within the <head> section of individual webpages. And provide page-specific instructions to search engines on whether to index (include in search results) and follow (crawl links within) each page.
- X-robot tags: These are code snippets that are primarily used for non-HTML files like PDFs and images. And are implemented in the file's HTTP header.
Further reading: Meta Robots Tag & X-Robots-Tag Explained
Why Is Robots.txt Important for SEO?
A robots.txt file helps manage web crawler activities, so they don’t overwork your website or bother with pages not meant for public view.
Below are a few reasons to use a robots.txt file:
1. Optimize Crawl Budget
Crawl budget refers to the number of pages Google will crawl on your site within a given time frame.
The number can vary based on your site’s size, health, and number of backlinks.
If your website’s number of pages exceeds your site’s crawl budget, you could have important pages that fail to get indexed.
Those unindexed pages won’t rank. Meaning you wasted time creating pages users won’t see.
Blocking unnecessary pages with robots.txt allows Googlebot (Google’s web crawler) to spend more crawl budget on pages that matter.
2. Block Duplicate and Non-Public Pages
Crawl bots don’t need to sift through every page on your site. Because not all of them were created to be served in the search engine results pages (SERPs).
Like staging sites, internal search results pages, duplicate pages, or login pages. Some content management systems handle these internal pages for you.
WordPress, for example, automatically disallows the login page “/wp-admin/” for all crawlers.
Robots.txt allows you to block these pages from crawlers.
3. Hide Resources
Sometimes, you want to exclude resources such as PDFs, videos, and images from search results.
To keep them private or have Google focus on more important content.
In either case, robots.txt keeps them from being crawled.
How Does a Robots.txt File Work?
Robots.txt files tell search engine bots which URLs they should crawl and (more importantly) which ones to ignore.
As they crawl webpages, search engine bots discover and follow links. This process takes them from site A to site B to site C across links, pages, and websites.
But if a bot finds a robots.txt file, it will read it before doing anything else.
The syntax is straightforward.
You assign rules by identifying the “user-agent” (search engine bot) and specifying the directives (rules).
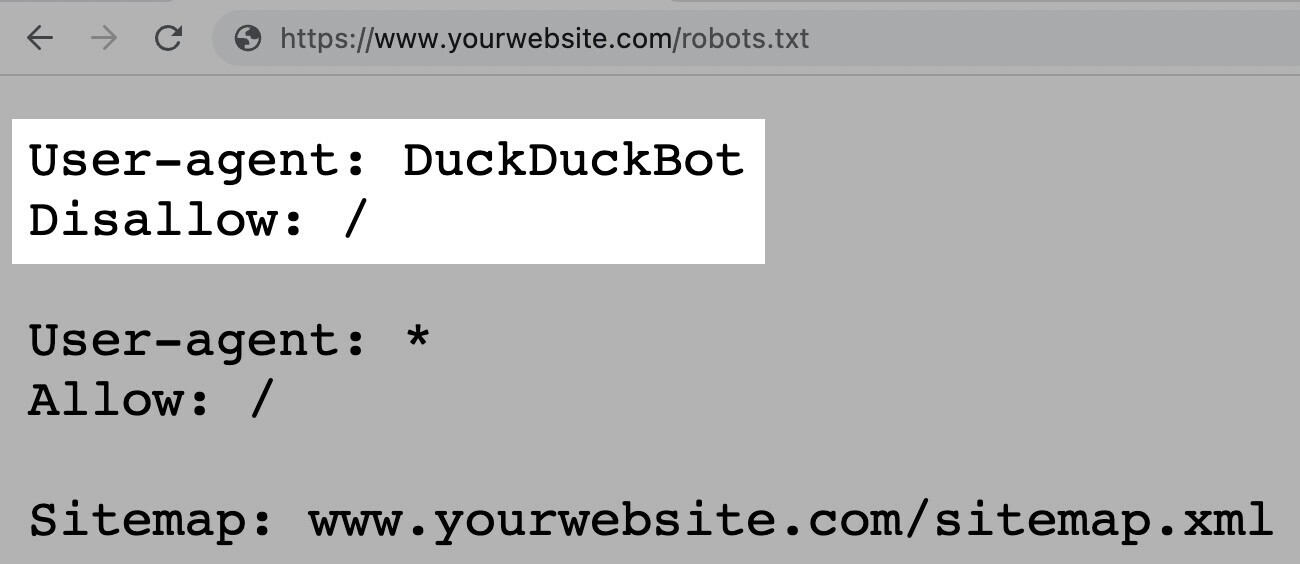
You can also use an asterisk (*) to assign directives to every user-agent, which applies the rule for all bots.
For example, the below instruction allows all bots except DuckDuckGo to crawl your site:
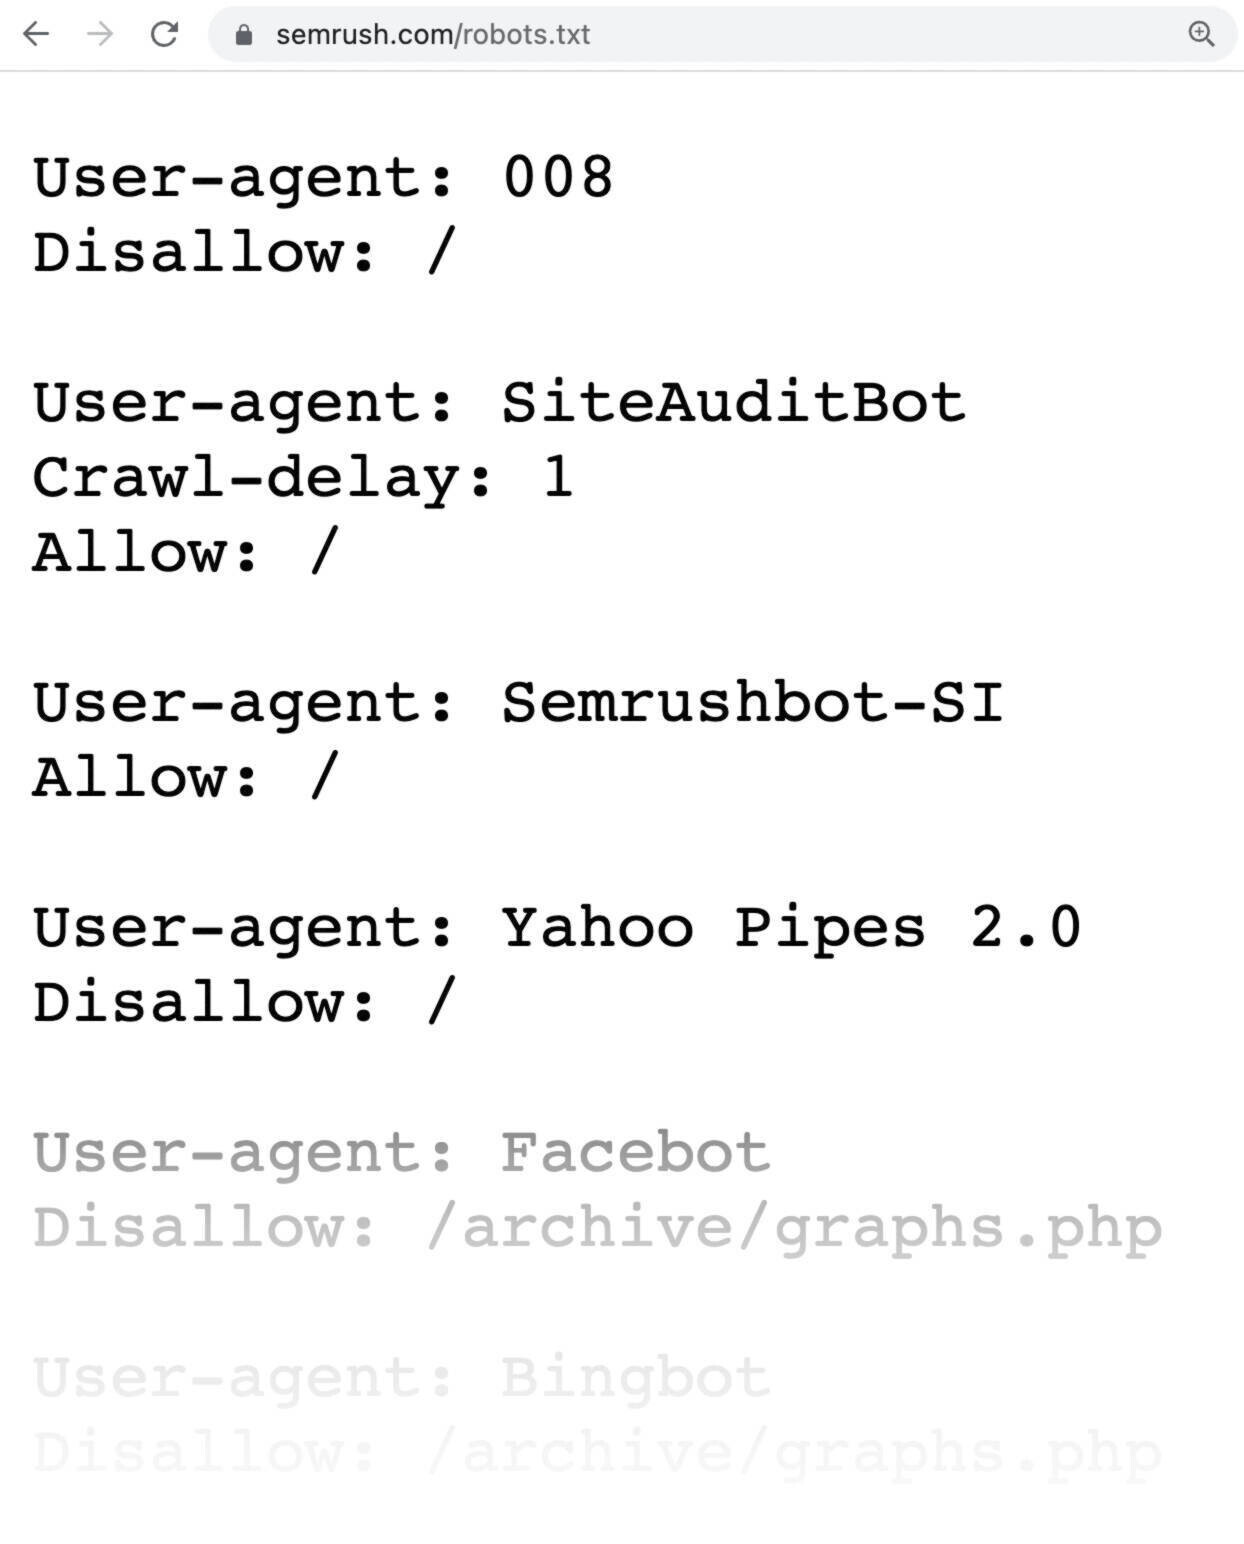
Semrush bots crawl the web to gather insights for our website optimization tools, such as Site Audit, Backlink Audit, and On Page SEO Checker.
Our bots respect the rules outlined in your robots.txt file. So, if you block our bots from crawling your website, they won’t.
But doing that also means you can’t use some of our tools to their full potential.
For example, if you blocked our SiteAuditBot from crawling your website, you couldn’t audit your site with our Site Audit tool. To analyze and fix technical issues on your site.
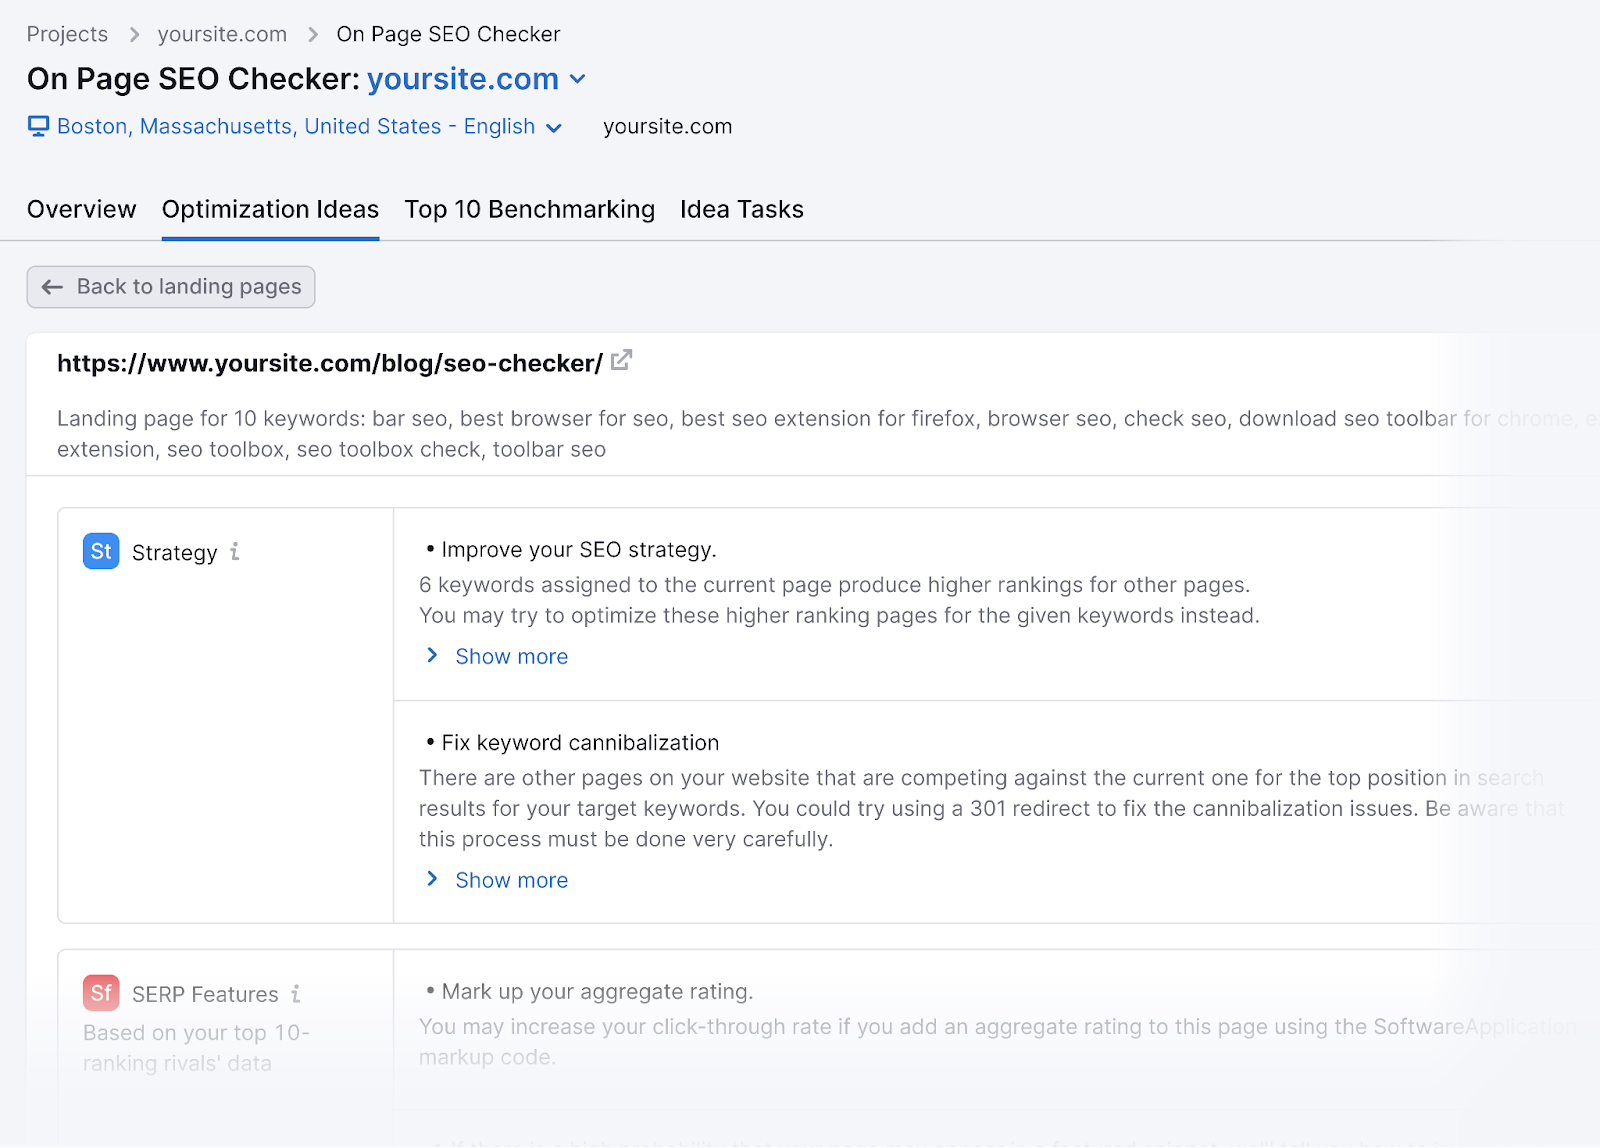
If you blocked our SemrushBot-SI from crawling your site, you couldn’t use the On Page SEO Checker tool effectively.
And you’d lose out on generating optimization ideas to improve your webpages’ rankings.
How to Find a Robots.txt File
Your robots.txt file is hosted on your server, just like any other file on your website.
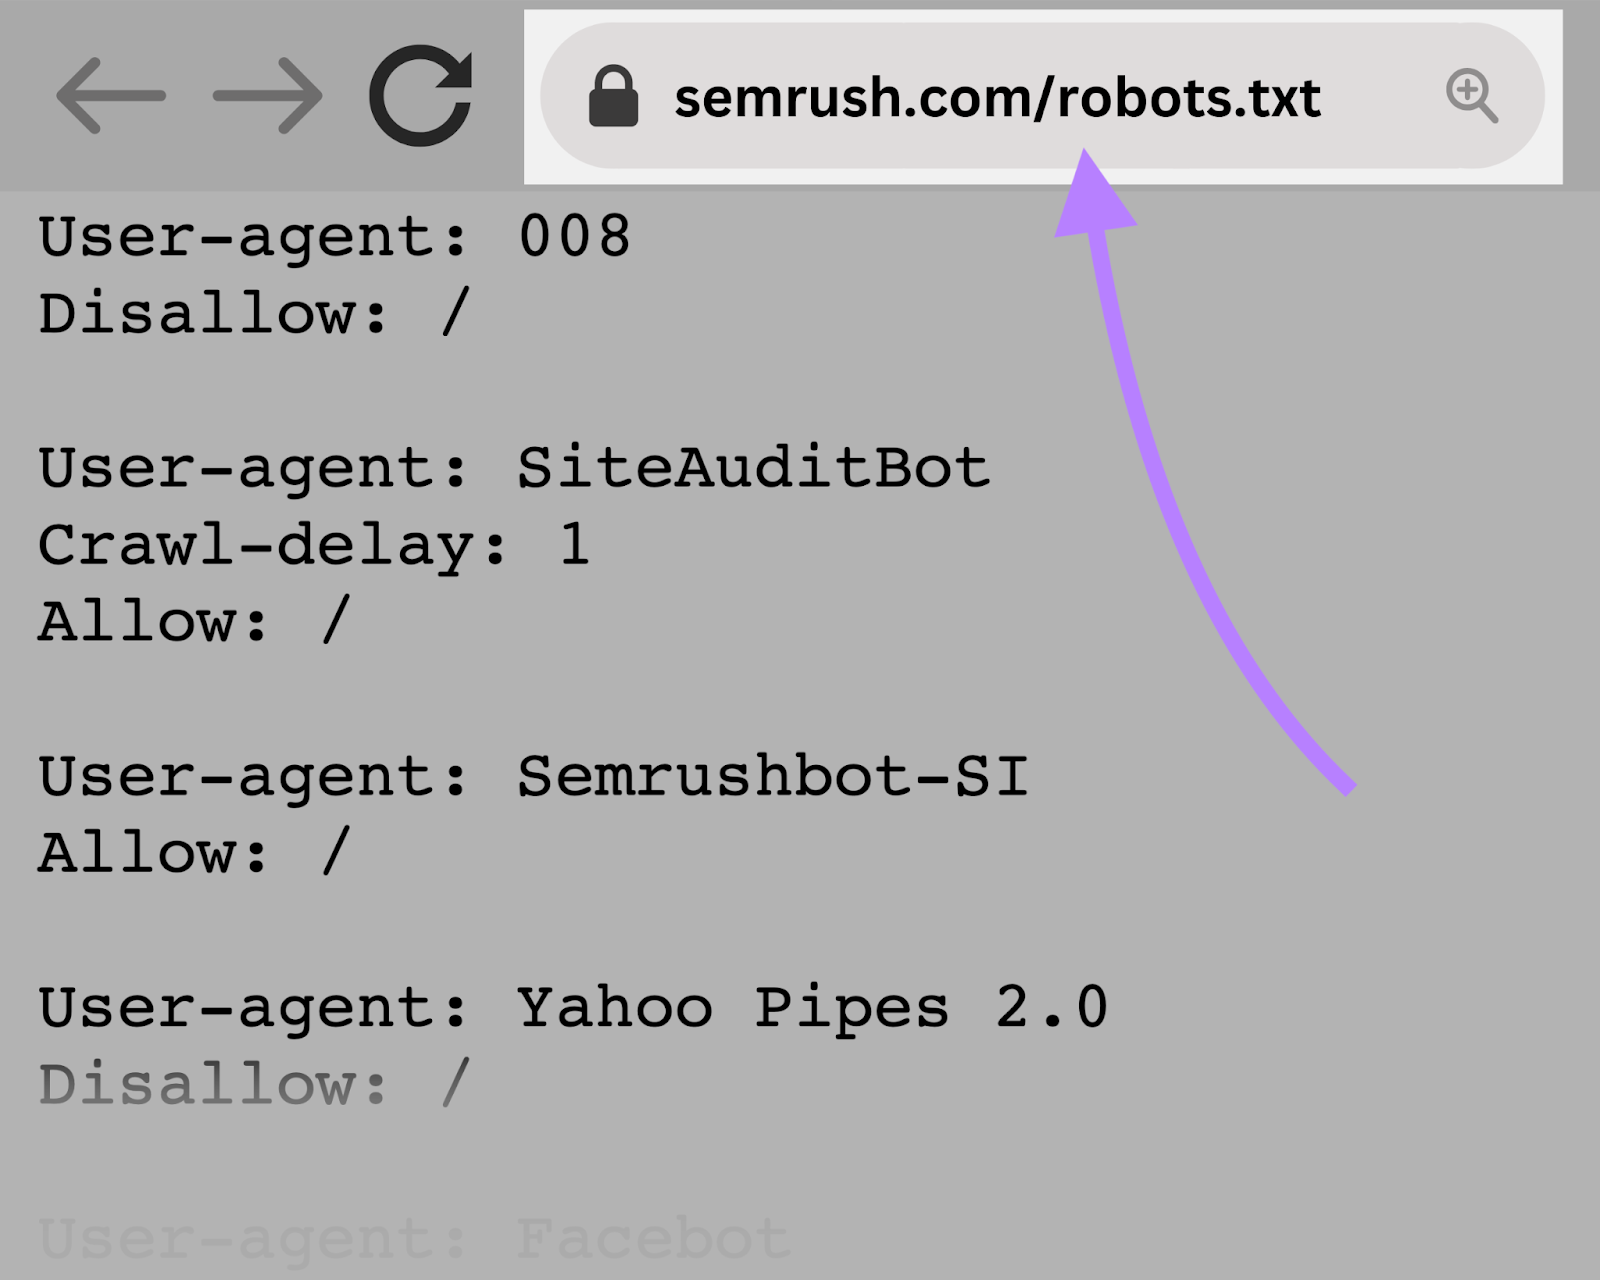
You can view the robots.txt file for any given website by typing the full URL for the homepage and adding “/robots.txt” at the end.
Like this: “https://semrush.com/robots.txt.”
Before learning how to create a robots.txt file or going into the syntax, let’s first look at some examples.
Examples of Robots.txt Files
Here are some real-world robots.txt examples from popular websites.
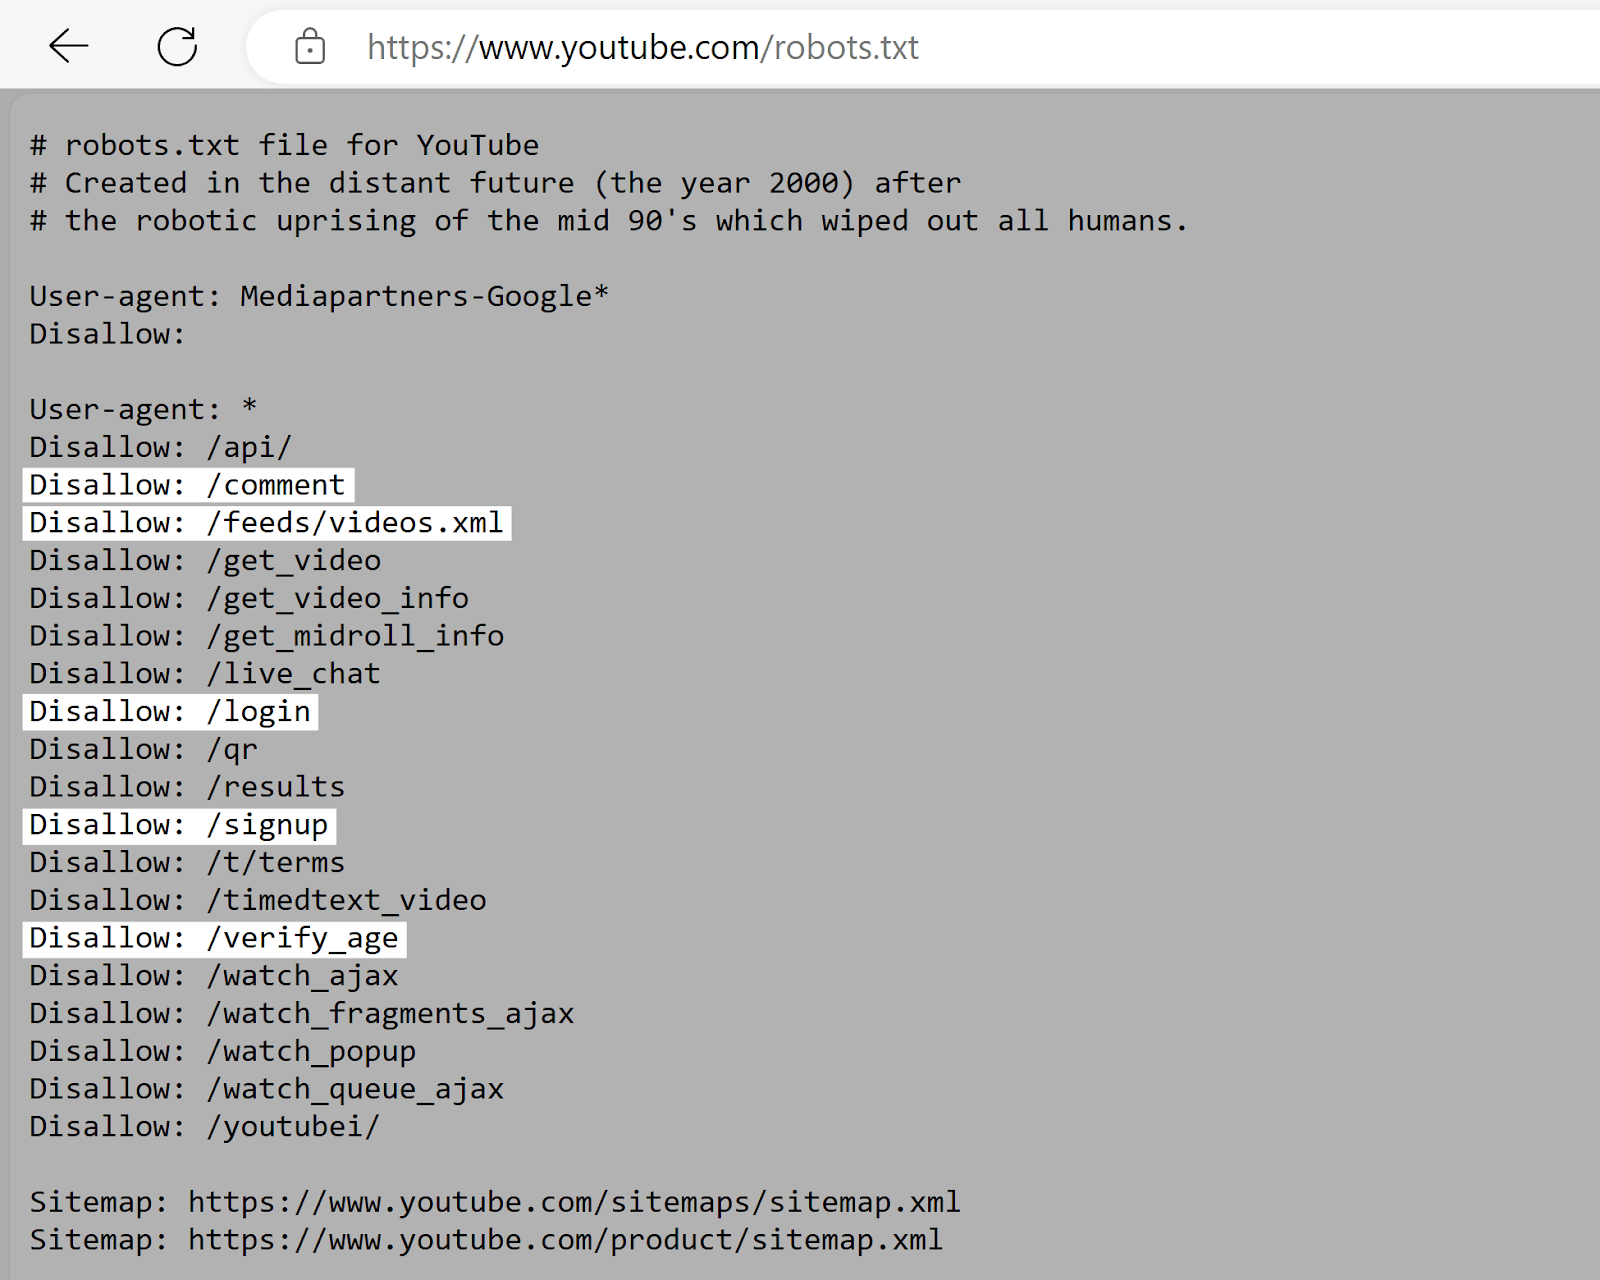
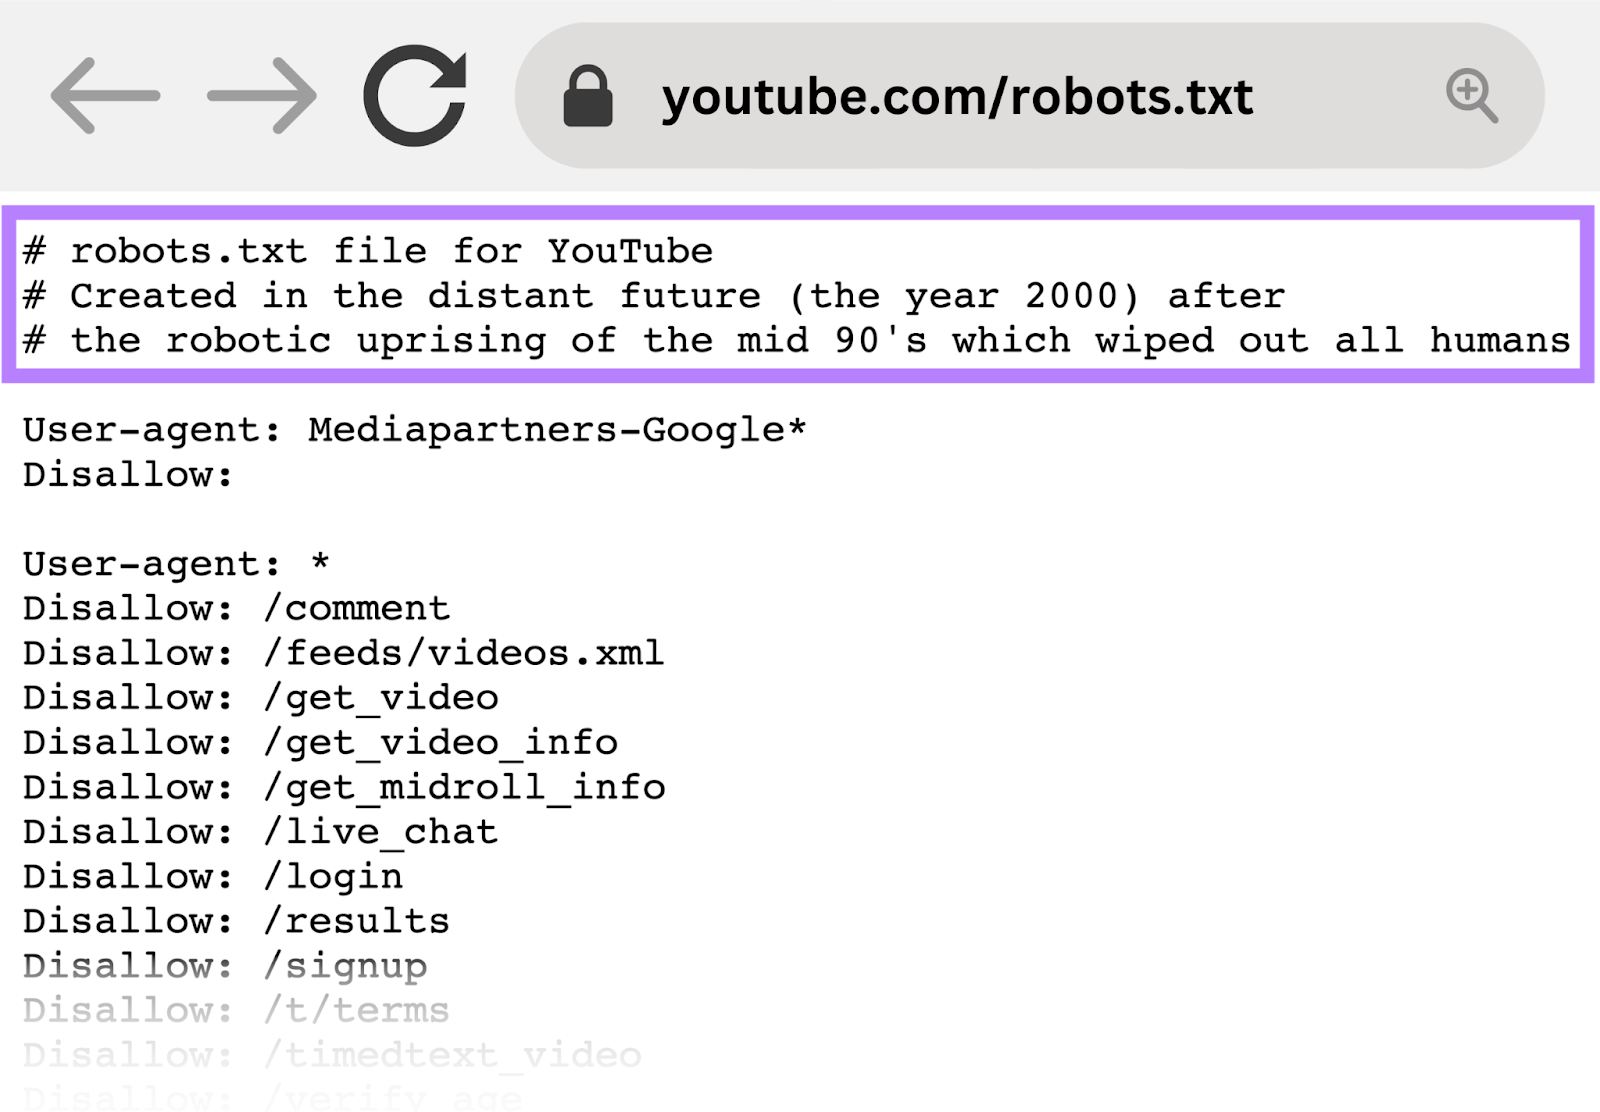
YouTube
YouTube’s robots.txt file tells crawlers not to access user comments, video feeds, login/signup pages, and age verification pages.
This discourages the indexing of user-specific or dynamic content that’s often irrelevant to search results and may raise privacy concerns.
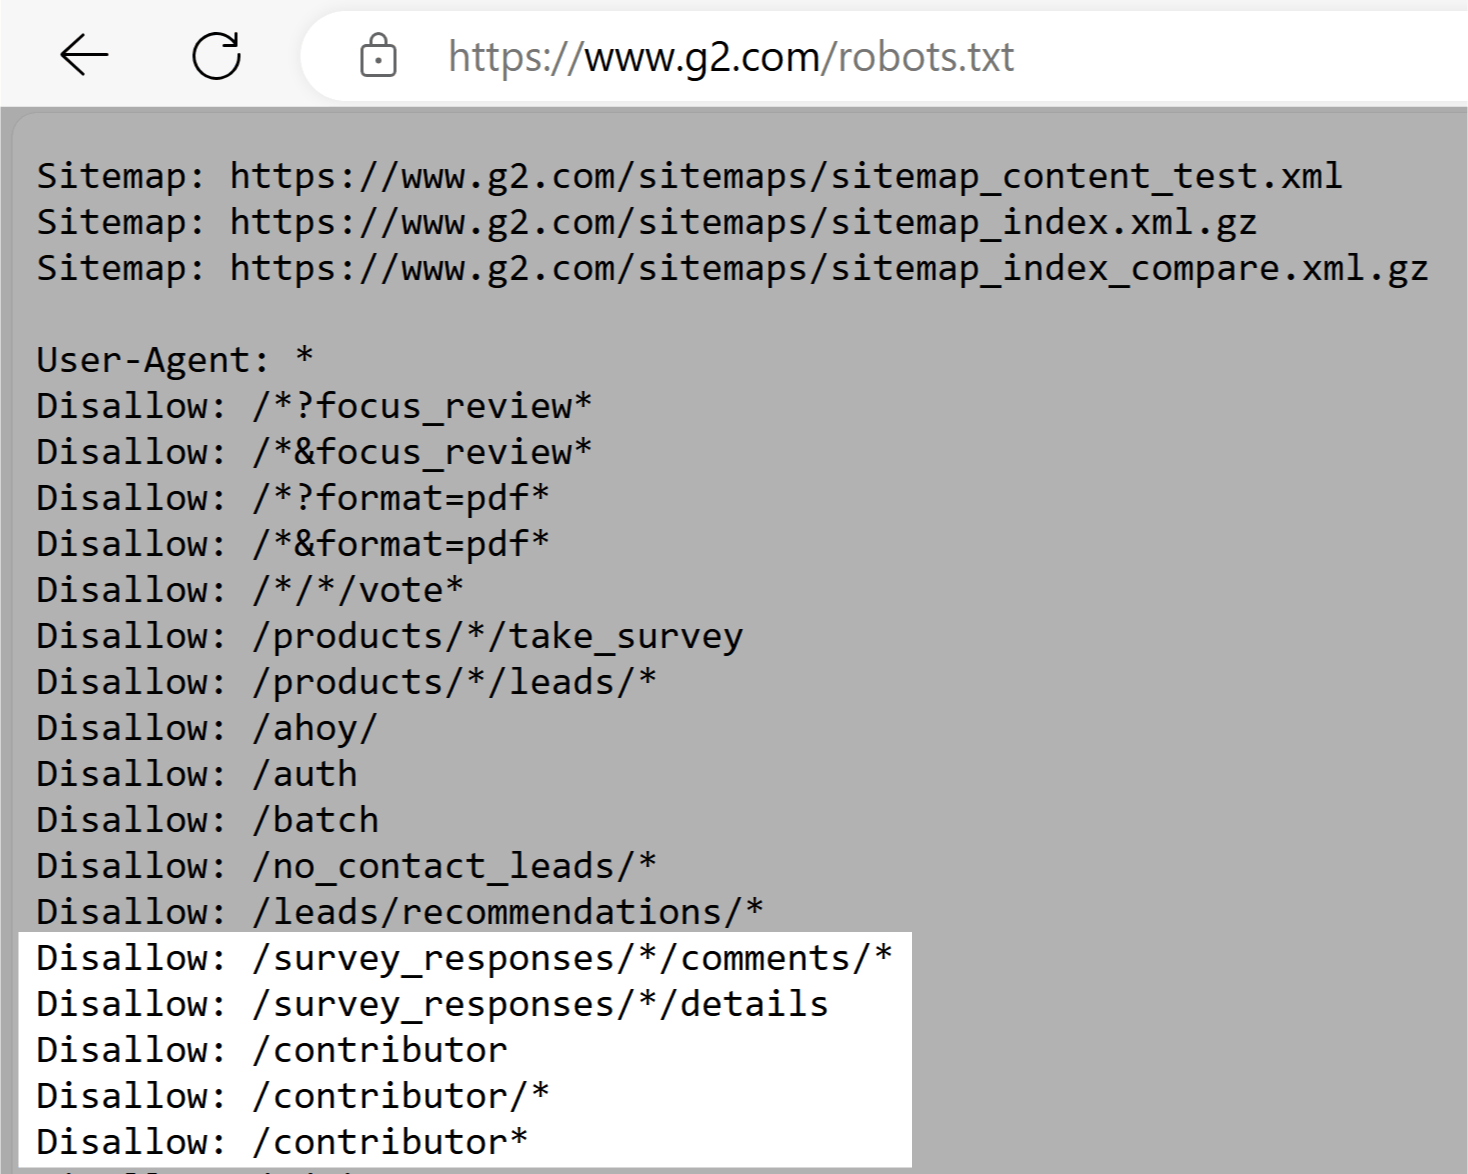
G2
G2’s robots.txt file tells crawlers not to access sections with user-generated content. Like survey responses, comments, and contributor profiles.
This helps protect user privacy by protecting potentially sensitive personal information. And also prevents users from attempting to manipulate search results.
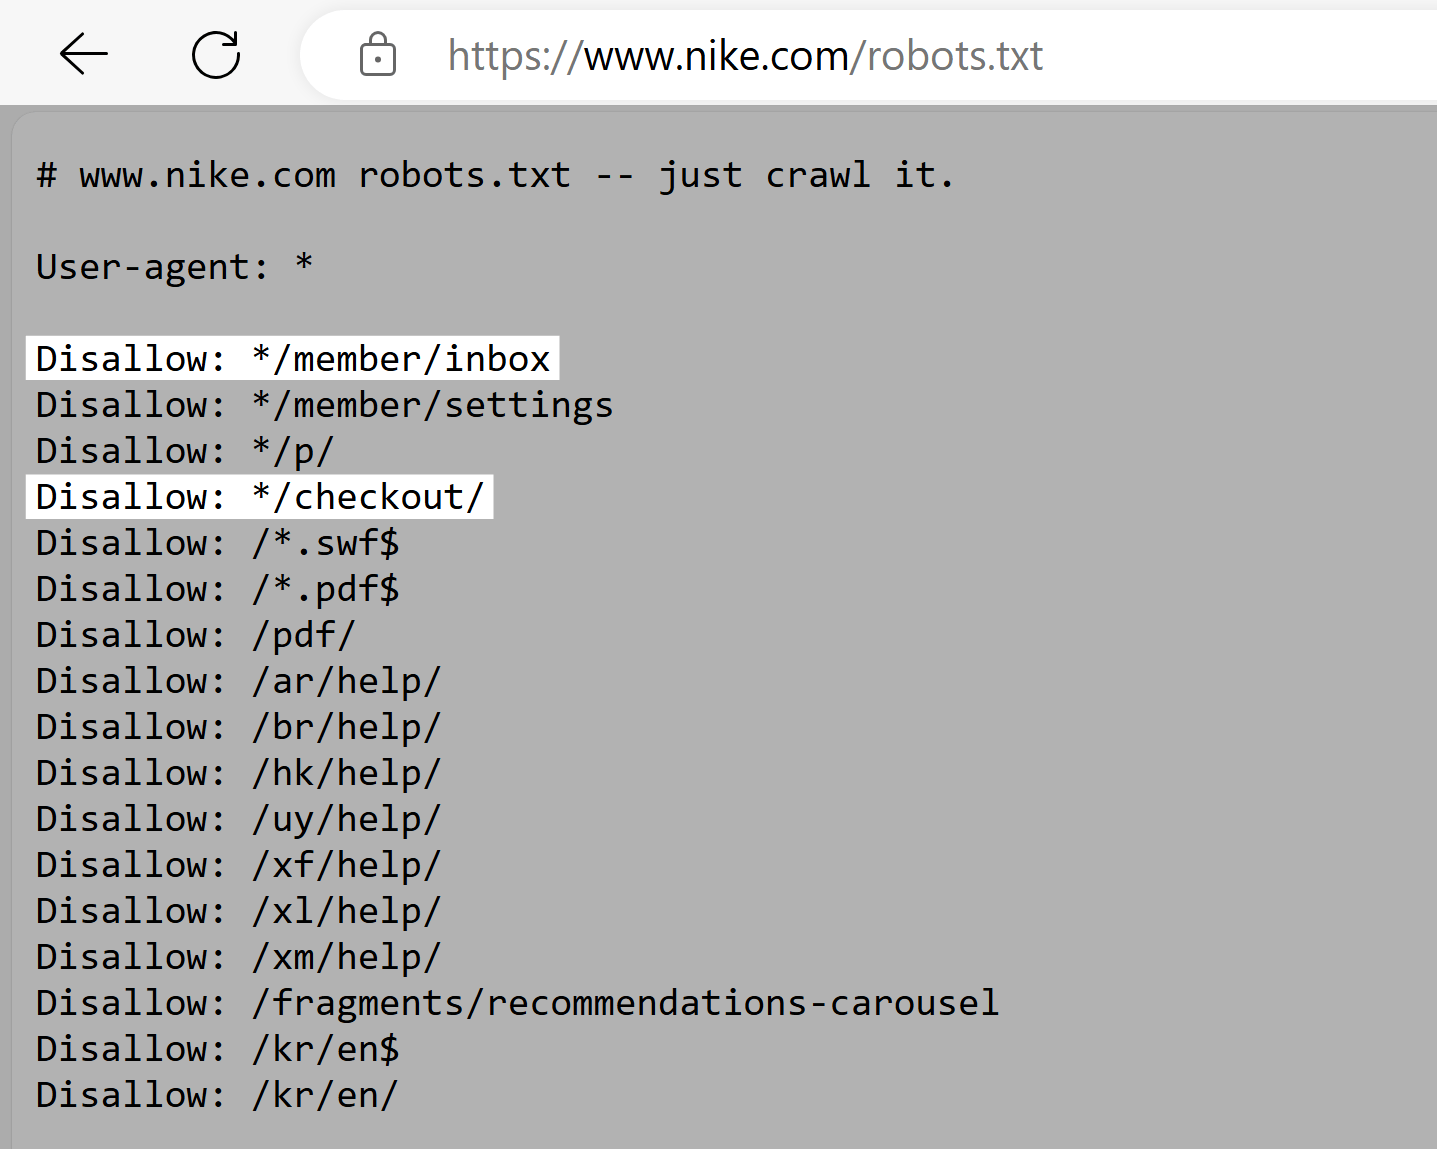
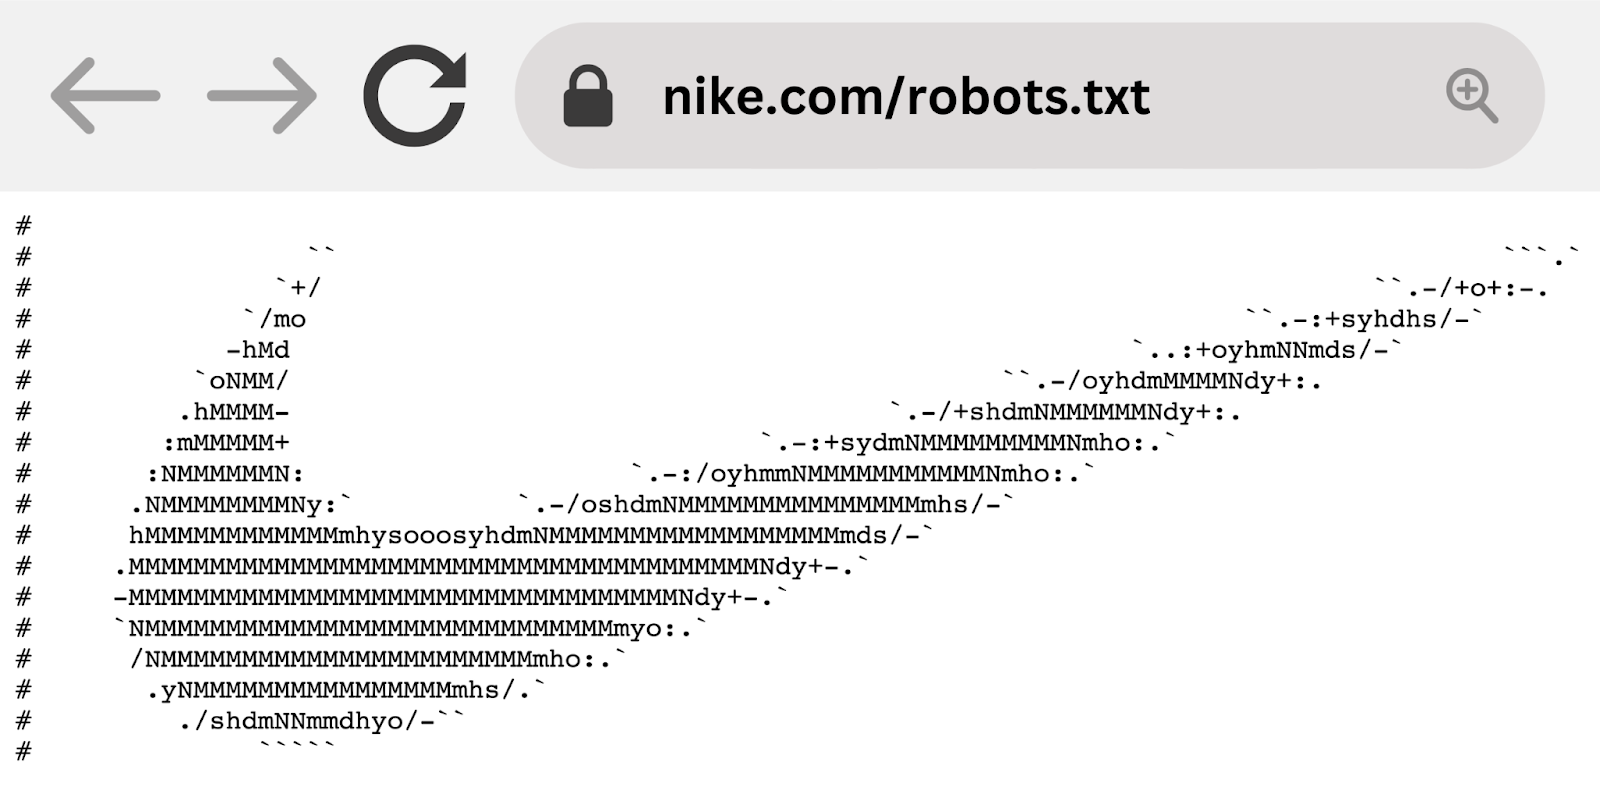
Nike
Nike’s robots.txt file uses the disallow directive to block crawlers from accessing user-generated directories. Like "/checkout/" and "*/member/inbox."
This ensures that potentially sensitive user data isn’t exposed in search results. And prevents attempts to manipulate SEO rankings.
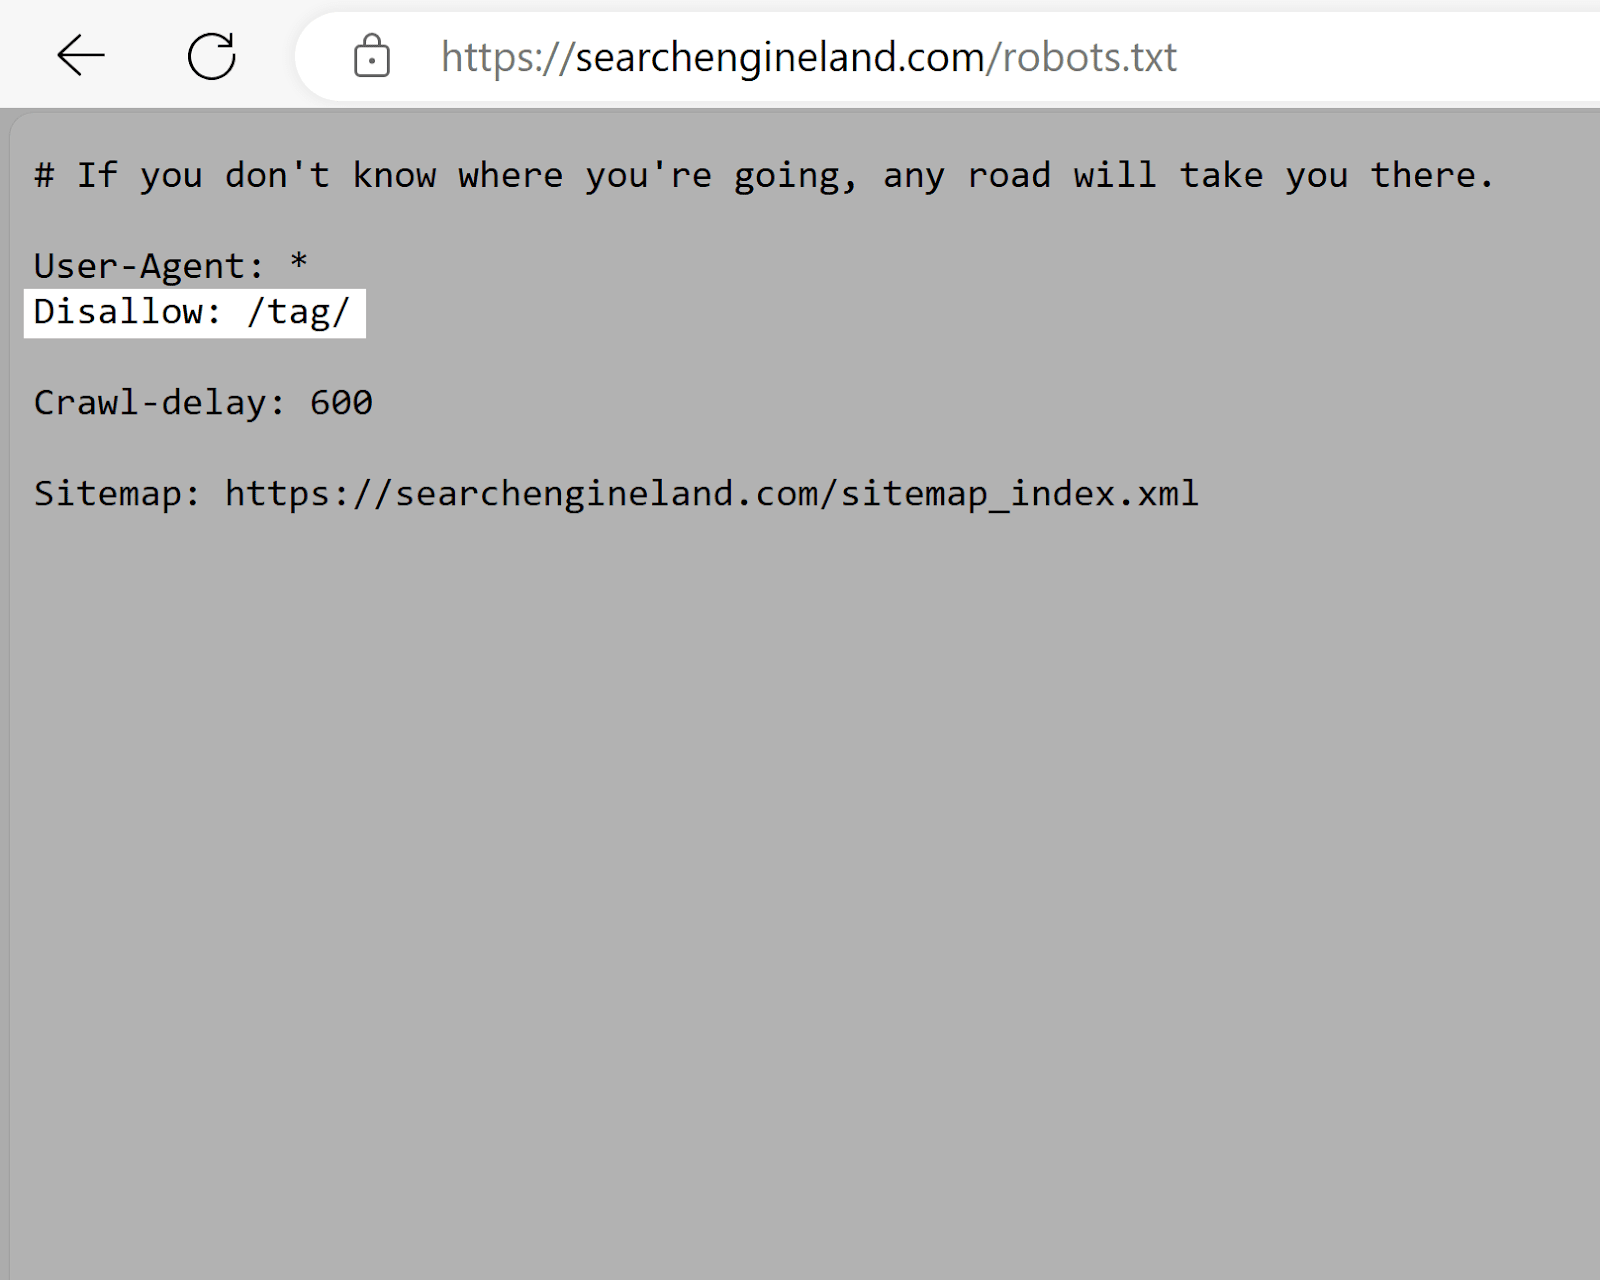
Search Engine Land
Search Engine Land’s robots.txt file uses the disallow tag to discourage the indexing of "/tag/" directory pages. Which tend to have low SEO value compared to actual content pages. And can cause duplicate content issues.
This encourages search engines to prioritize crawling higher-quality content, maximizing the website's crawl budget.
Which is especially important given how many pages Search Engine Land has.
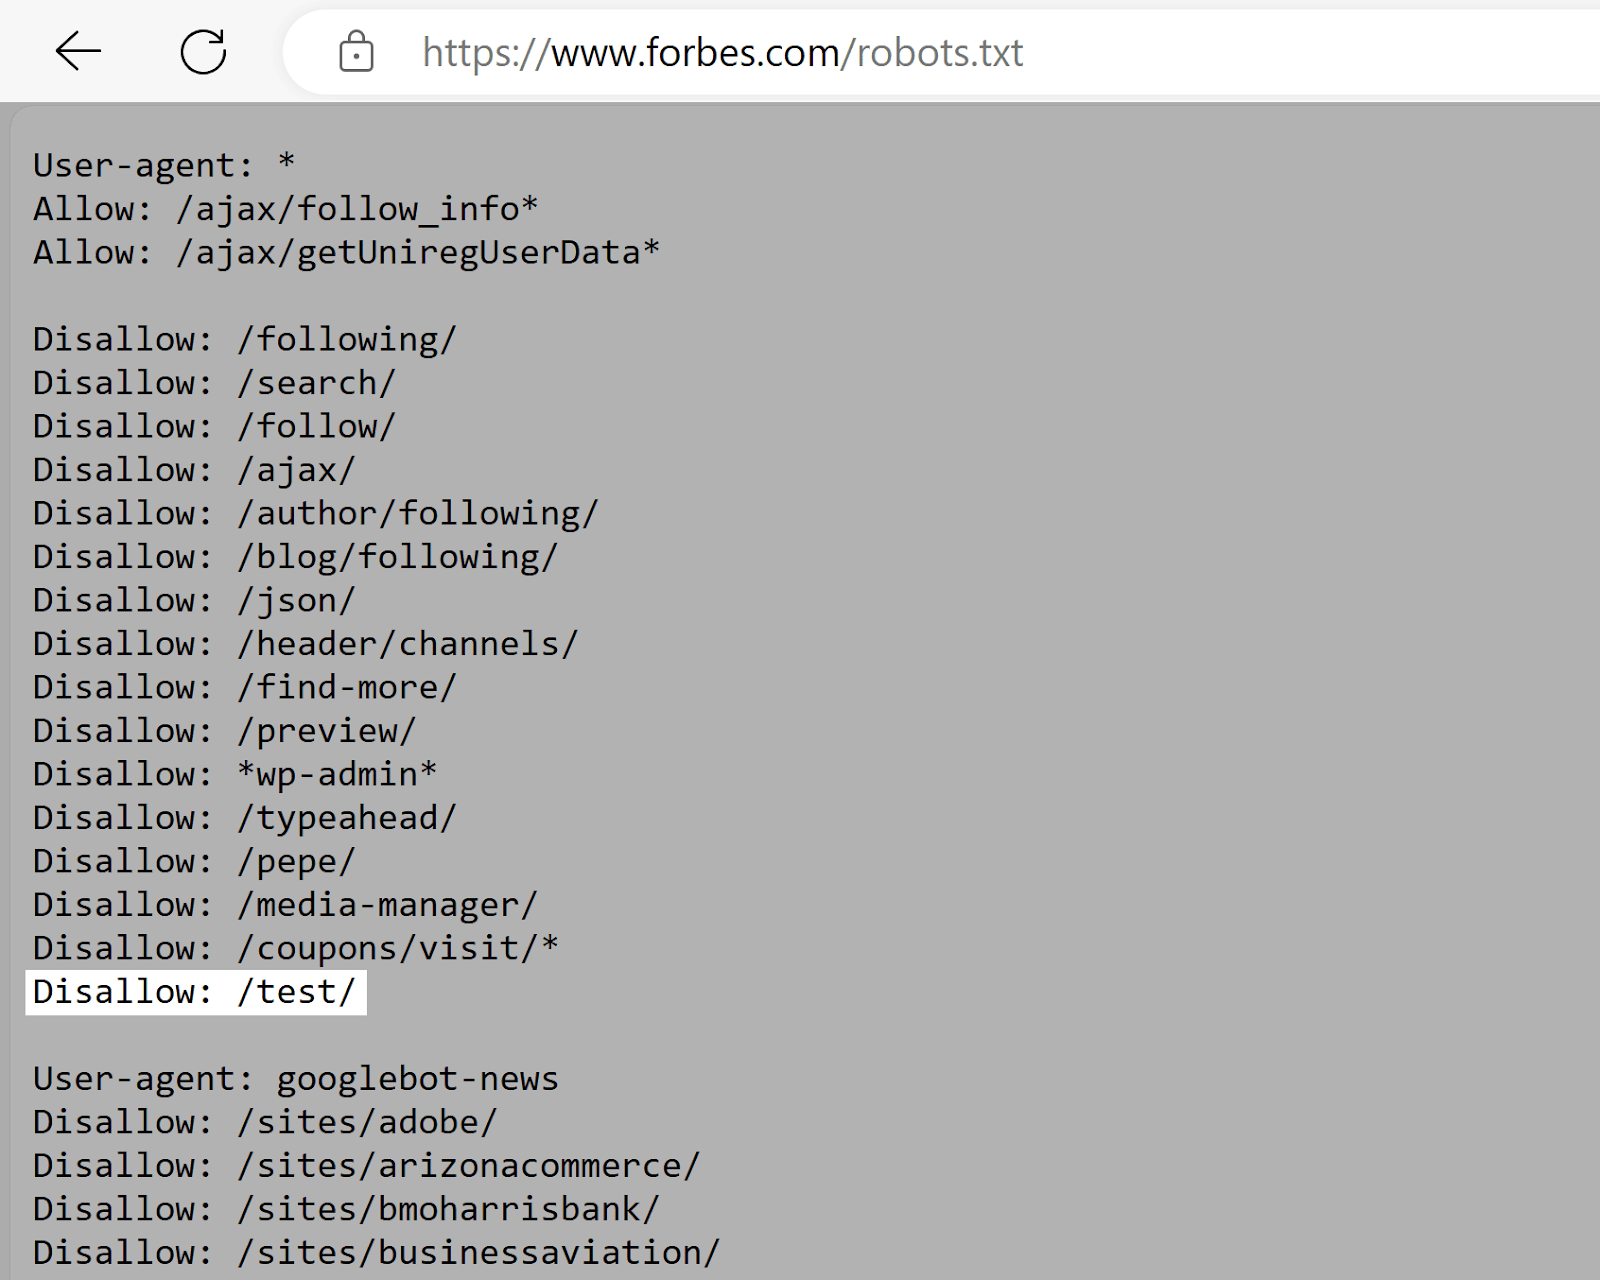
Forbes
Forbes’s robots.txt file instructs Google to avoid the "/test/" directory. Which likely contains testing or staging environments.
This prevents unfinished or sensitive content from being indexed (assuming it isn’t linked to elsewhere.)
Explaining Robots.txt Syntax
A robots.txt file is made up of:
- One or more blocks of “directives” (rules)
- Each with a specified “user-agent” (search engine bot)
- And an “allow” or “disallow” instruction
A simple block can look like this:
User-agent: Googlebot
Disallow: /not-for-google
User-agent: DuckDuckBot
Disallow: /not-for-duckduckgo
Sitemap: https://www.yourwebsite.com/sitemap.xml
The User-Agent Directive
The first line of every directive block is the user-agent, which identifies the crawler.
If you want to tell Googlebot not to crawl your WordPress admin page, for example, your directive will start with:
User-agent: Googlebot
Disallow: /wp-admin/When multiple directives are present, the bot may choose the most specific block of directives available.
Let’s say you have three sets of directives: one for *, one for Googlebot, and one for Googlebot-Image.
If the Googlebot-News user agent crawls your site, it will follow the Googlebot directives.
On the other hand, the Googlebot-Image user agent will follow the more specific Googlebot-Image directives.
The Disallow Robots.txt Directive
The second line of a robots.txt directive is the “disallow” line.
You can have multiple disallow directives that specify which parts of your site the crawler can’t access.
An empty disallow line means you’re not disallowing anything—a crawler can access all sections of your site.
For example, if you wanted to allow all search engines to crawl your entire site, your block would look like this:
User-agent: *
Allow: /
If you wanted to block all search engines from crawling your site, your block would look like this:
User-agent: *
Disallow: /The Allow Directive
The “allow” directive allows search engines to crawl a subdirectory or specific page, even in an otherwise disallowed directory.
For example, if you want to prevent Googlebot from accessing every post on your blog except for one, your directive might look like this:
User-agent: Googlebot
Disallow: /blog
Allow: /blog/example-postThe Sitemap Directive
The Sitemap directive tells search engines—specifically Bing, Yandex, and Google—where to find your XML sitemap.
Sitemaps generally include the pages you want search engines to crawl and index.
This directive lives at the top or bottom of a robots.txt file and looks like this:
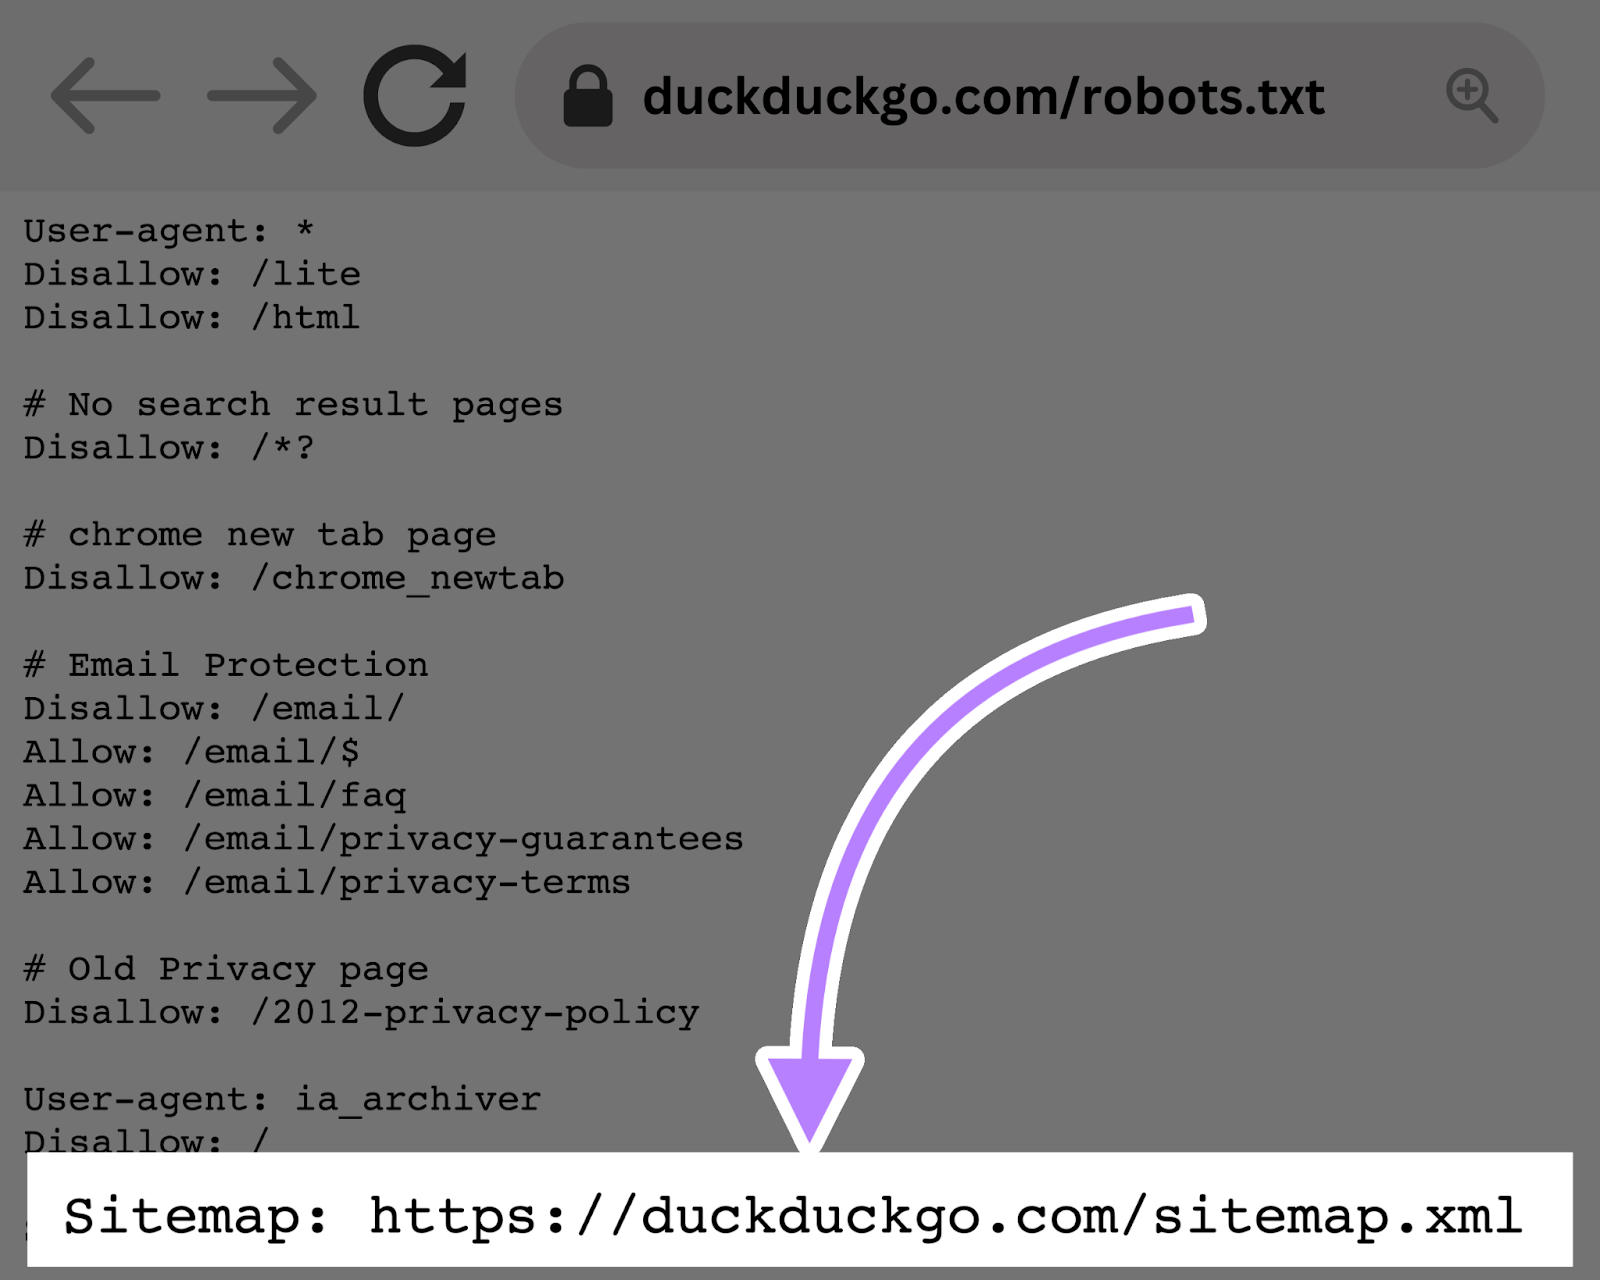
Adding a Sitemap directive to your robots.txt file is a quick alternative. But you can (and should) also submit your XML sitemap to each search engine using their webmaster tools.
Search engines will crawl your site eventually, but submitting a sitemap speeds up the crawling process.
The Crawl-Delay Directive
The “crawl-delay” directive instructs crawlers to delay their crawl rates. To avoid overtaxing a server (i.e., slowing down your website).
Google no longer supports the crawl-delay directive. And if you want to set your crawl rate for Googlebot, you’ll have to do it in Search Console.
But Bing and Yandex do support the crawl-delay directive. Here’s how to use it.
Let’s say you want a crawler to wait 10 seconds after each crawl action. You would set the delay to 10 like so:
User-agent: *
Crawl-delay: 10
Further reading: 15 Crawlability Problems & How to Fix Them
The Noindex Directive
A robots.txt file tells a bot what it should or shouldn’t crawl. But it can’t tell a search engine which URLs not to index and serve in search results.
Using the noindex tag in your robots.txt file may block a bot from knowing what’s on your page. But the page can still show up in search results. Albeit with no information.
Like this:
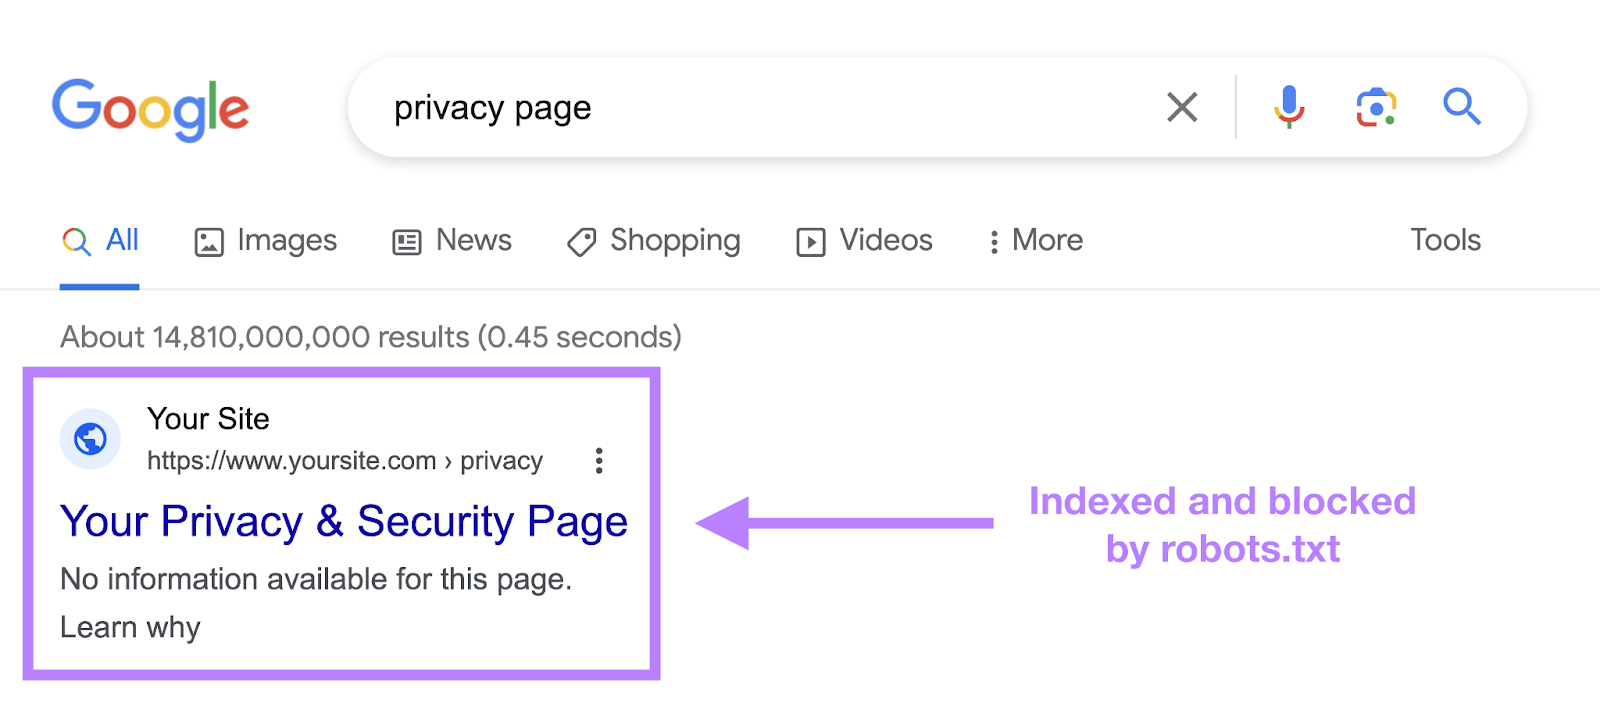
Google never officially supported this directive. And on September 1, 2019, Google even announced that they indeed don’t support the noindex directive in robots.txt.
If you want to reliably exclude a page or file from appearing in search results, avoid this directive altogether and use a meta robots noindex tag instead.
How to Create a Robots.txt File
Use a robots.txt generator tool or create one yourself.
Here’s how to create one from scratch:
1. Create a File and Name It Robots.txt
Start by opening a .txt document within a text editor or web browser.
Next, name the document “robots.txt.”
You’re now ready to start typing directives.
2. Add Directives to the Robots.txt File
A robots.txt file consists of one or more groups of directives. And each group consists of multiple lines of instructions.
Each group begins with a user-agent and has the following information:
- Who the group applies to (the user-agent)
- Which directories (pages) or files the agent should access
- Which directories (pages) or files the agent shouldn’t access
- A sitemap (optional) to tell search engines which pages and files you deem important
Crawlers ignore lines that don’t match these directives.
Let’s say you don’t want Google crawling your “/clients/” directory because it’s just for internal use.
The first group would look something like this:
User-agent: Googlebot
Disallow: /clients/
Additional instructions can be added in a separate line below, like this:
User-agent: Googlebot
Disallow: /clients/
Disallow: /not-for-google
Once you’re done with Google’s specific instructions, hit enter twice to create a new group of directives.
Let’s make this one for all search engines and prevent them from crawling your “/archive/” and “/support/” directories because they’re for internal use only.
It would look like this:
User-agent: Googlebot
Disallow: /clients/
Disallow: /not-for-google
User-agent: *
Disallow: /archive/
Disallow: /support/
Once you’re finished, add your sitemap.
Your finished robots.txt file would look something like this:
User-agent: Googlebot
Disallow: /clients/
Disallow: /not-for-google
User-agent: *
Disallow: /archive/
Disallow: /support/
Sitemap: https://www.yourwebsite.com/sitemap.xml
Then, save your robots.txt file. And remember that it must be named “robots.txt.”
3. Upload the Robots.txt File
After you’ve saved the robots.txt file to your computer, upload it to your site and make it available for search engines to crawl.
Unfortunately, there’s no universal tool for this step.
Uploading the robots.txt file depends on your site’s file structure and web hosting.
Search online or reach out to your hosting provider for help on uploading your robots.txt file.
For example, you can search for "upload robots.txt file to WordPress."
Below are some articles explaining how to upload your robots.txt file in the most popular platforms:
- Robots.txt file in WordPress
- Robots.txt file in Wix
- Robots.txt file in Joomla
- Robots.txt file in Shopify
- Robots.txt file in BigCommerce
After uploading the file, check if anyone can see it and if Google can read it.
Here’s how.
4. Test Your Robots.txt File
First, test whether your robots.txt file is publicly accessible (i.e., if it was uploaded correctly).
Open a private window in your browser and search for your robots.txt file.
For example, “https://semrush.com/robots.txt.”
If you see your robots.txt file with the content you added, you’re ready to test the markup (HTML code).
Google offers two options for testing robots.txt markup:
- The robots.txt report in Search Console
- Google’s open-source robots.txt library (advanced)
Because the second option is geared toward advanced developers, let’s test with Search Console.
Go to the robots.txt report by clicking the link.
If you haven’t linked your website to your Google Search Console account, you’ll need to add a property first.
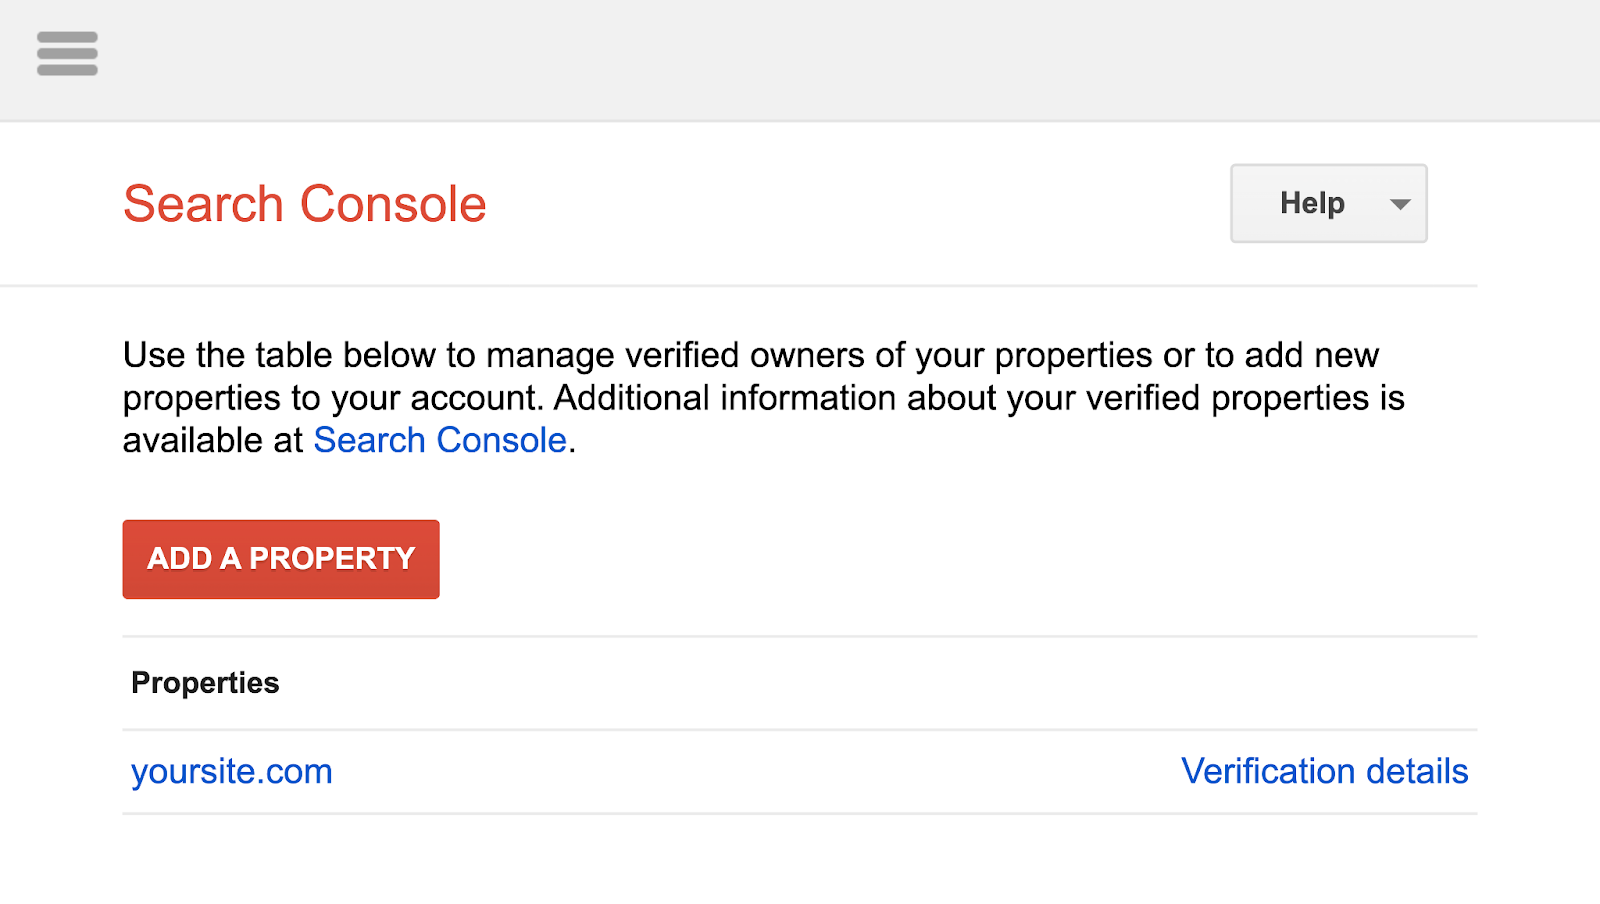
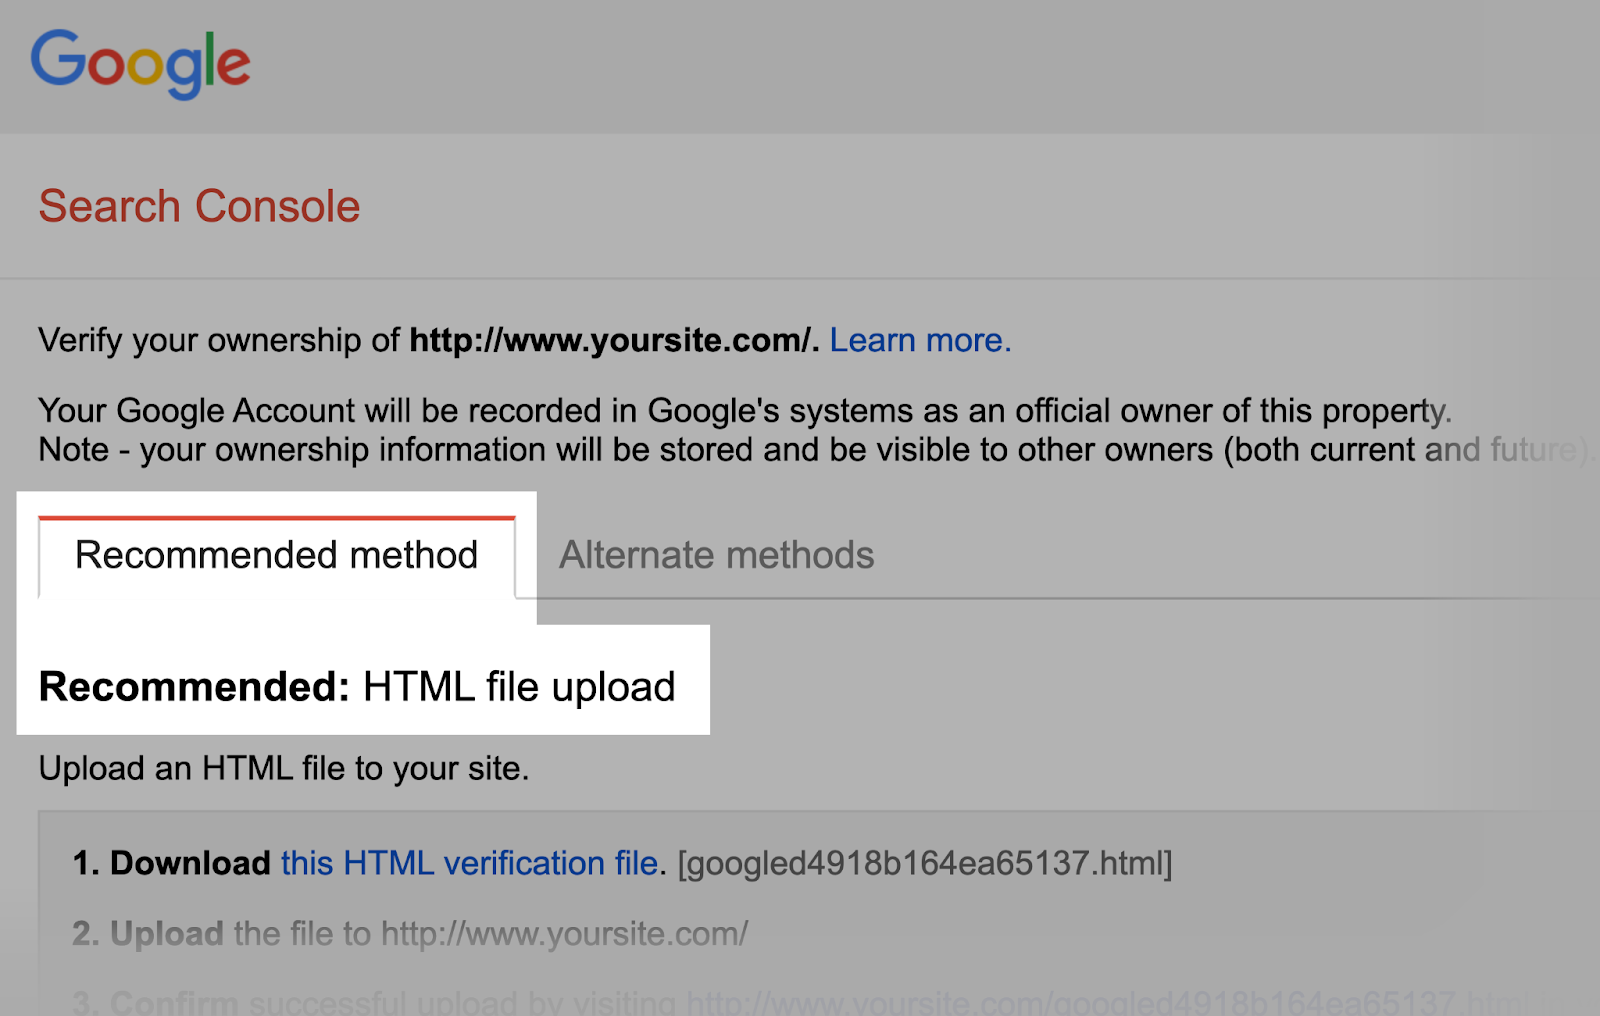
Then, verify that you’re the site’s owner.
If you have existing verified properties, select one from the drop-down list.
The tool will identify syntax warnings and logic errors.
And display the total number of warnings and errors below the editor.
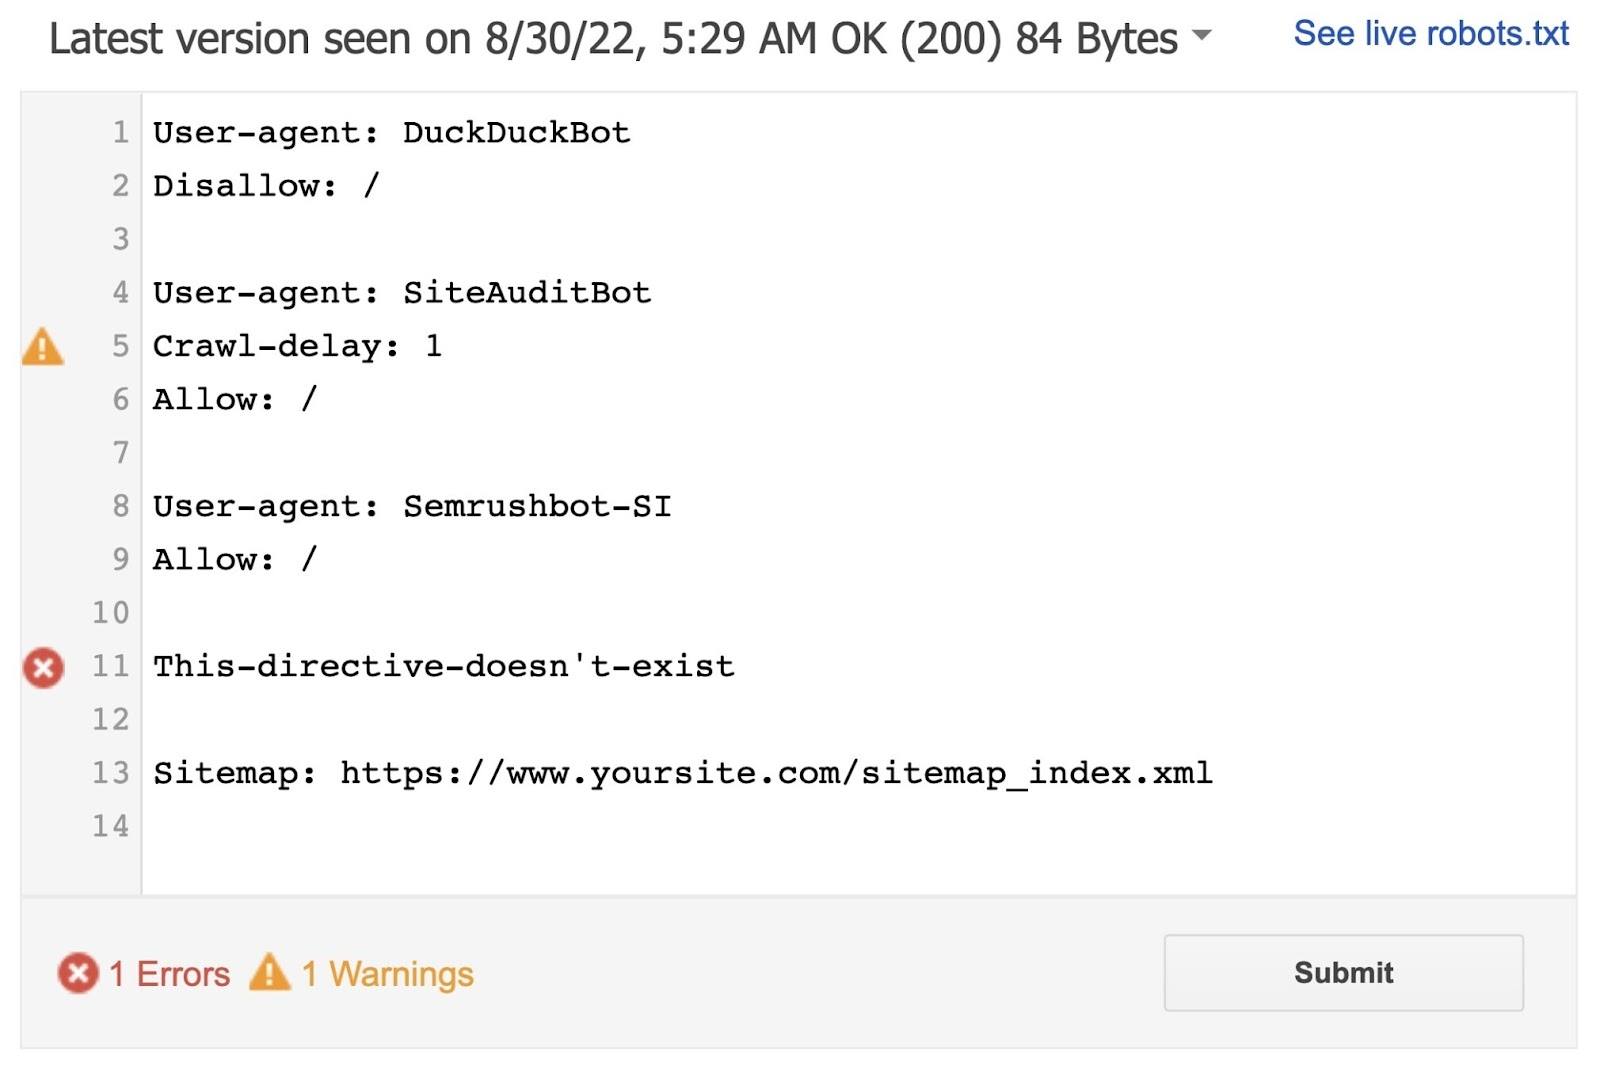
You can edit errors or warnings directly on the page and retest as you go.
Any changes made on the page aren’t saved to your site. So, copy and paste the edited test copy into the robots.txt file on your site.
Semrush’s Site Audit tool can also check for issues regarding your robots.txt file.
First, set up a project in the tool to audit your website.
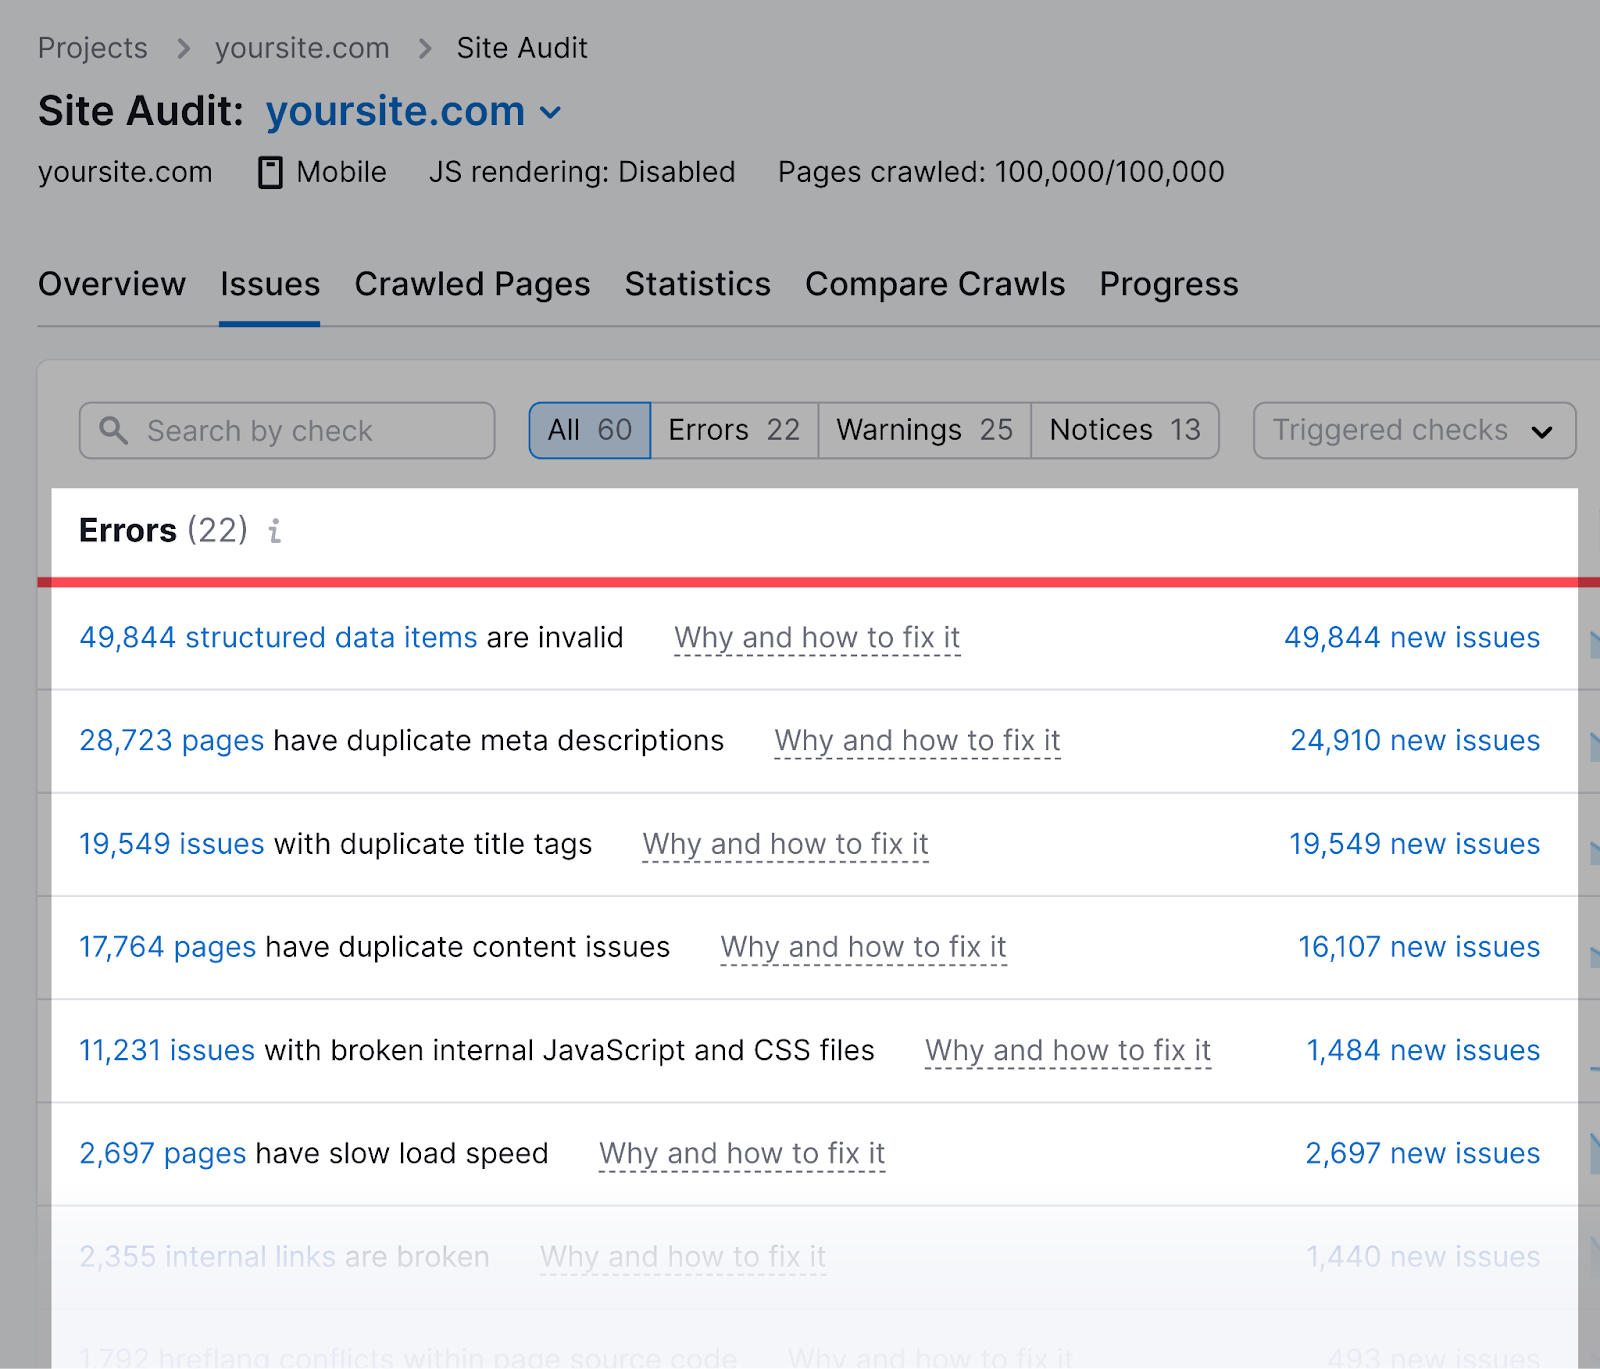
Once the audit is complete, navigate to the “Issues” tab and search for “robots.txt.”
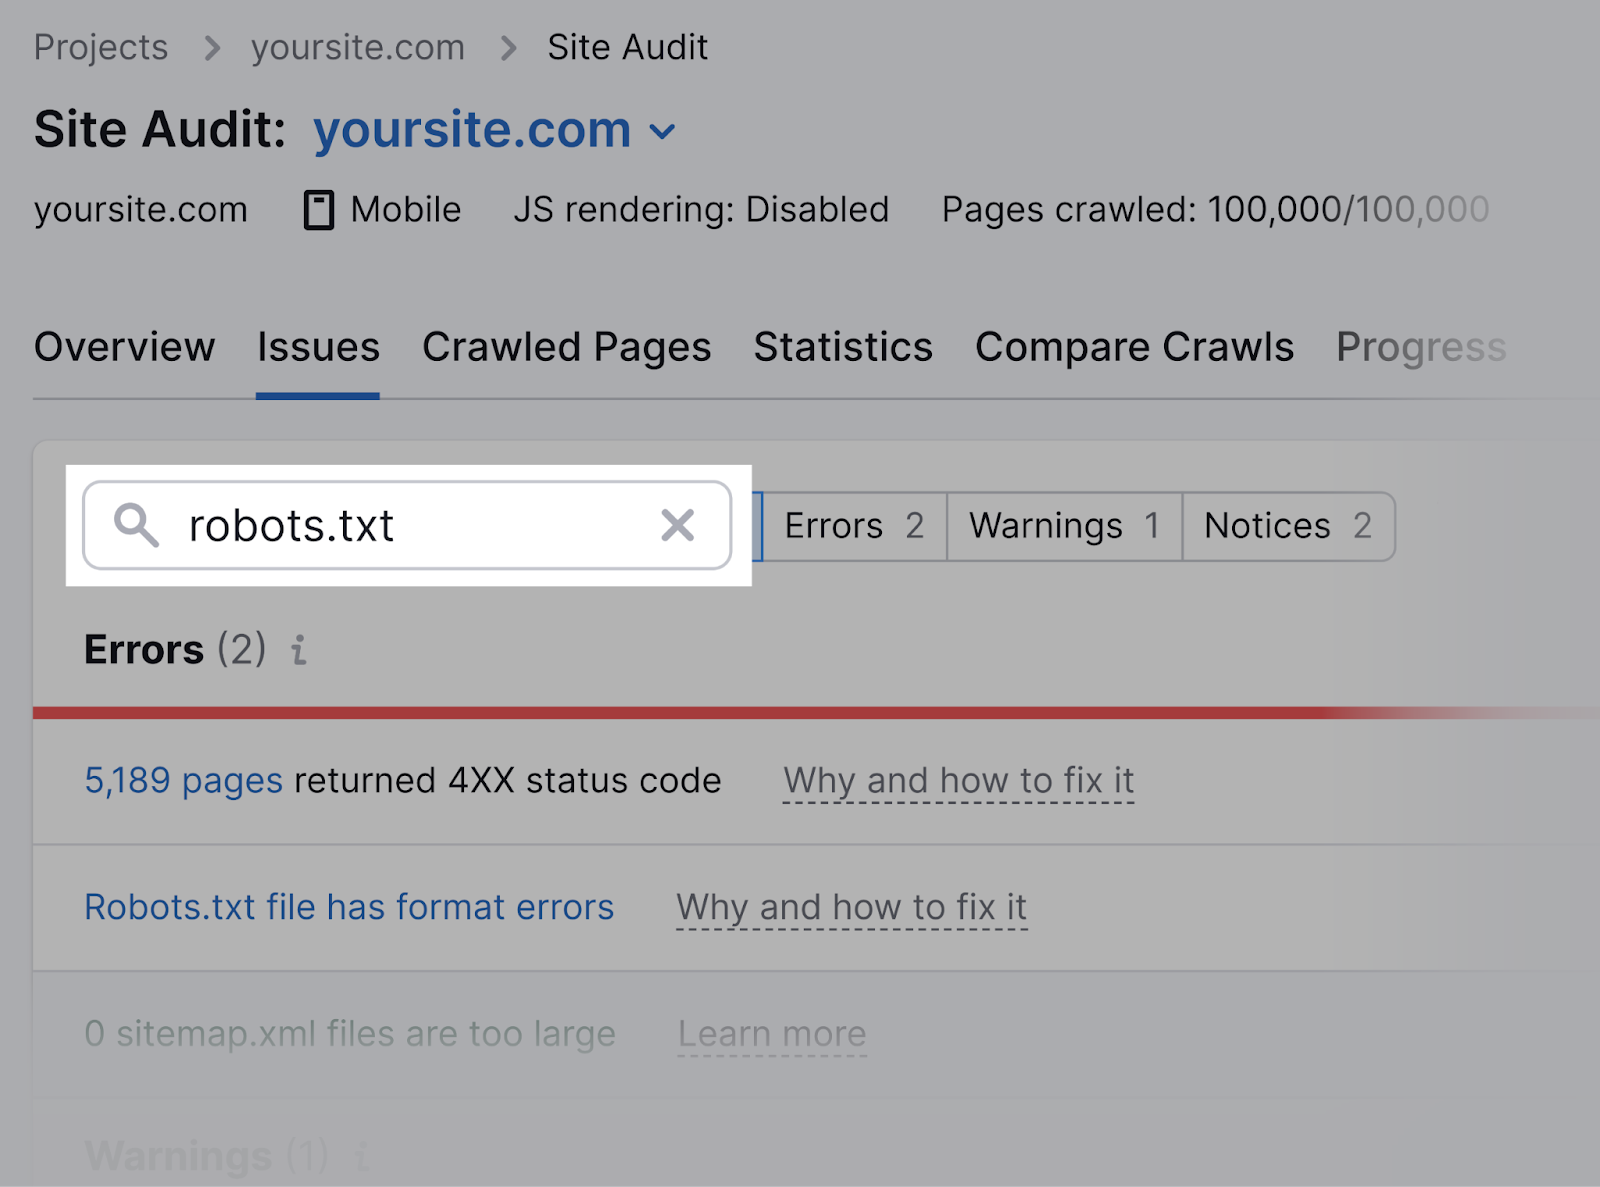
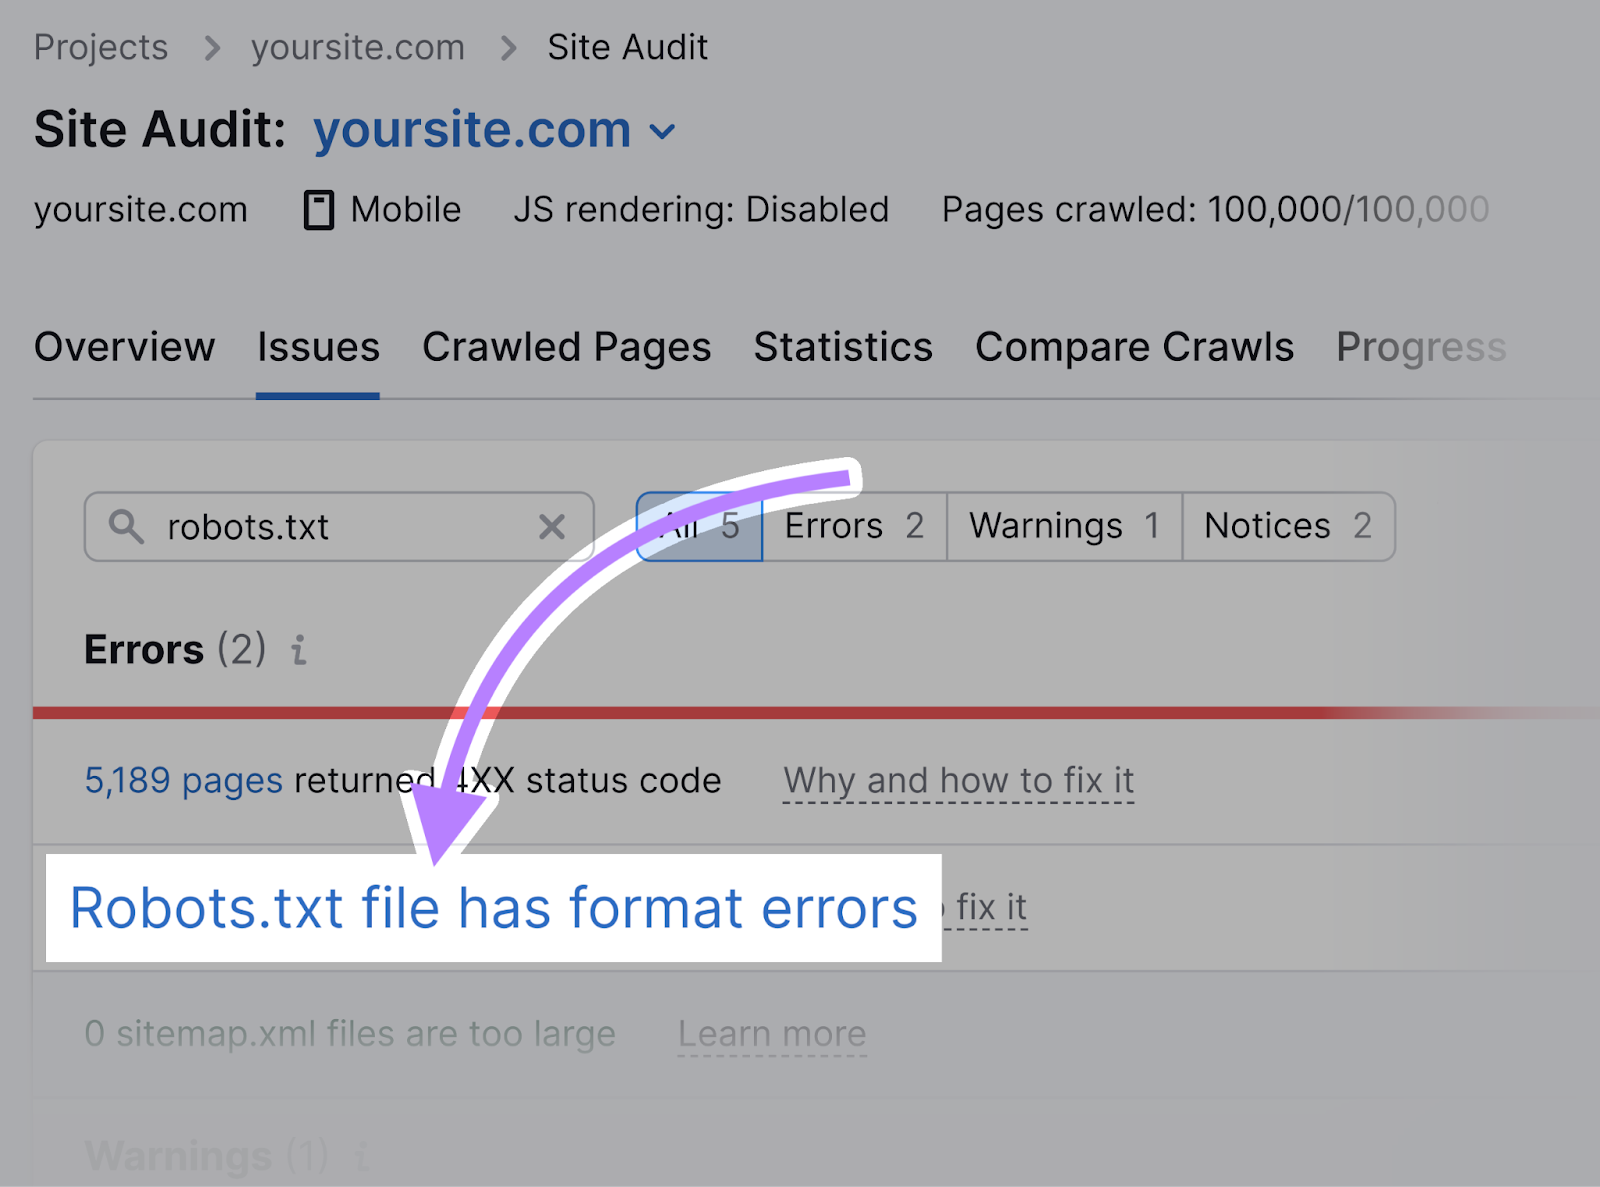
Click on the “Robots.txt file has format errors” link if it turns out that your file has format errors.
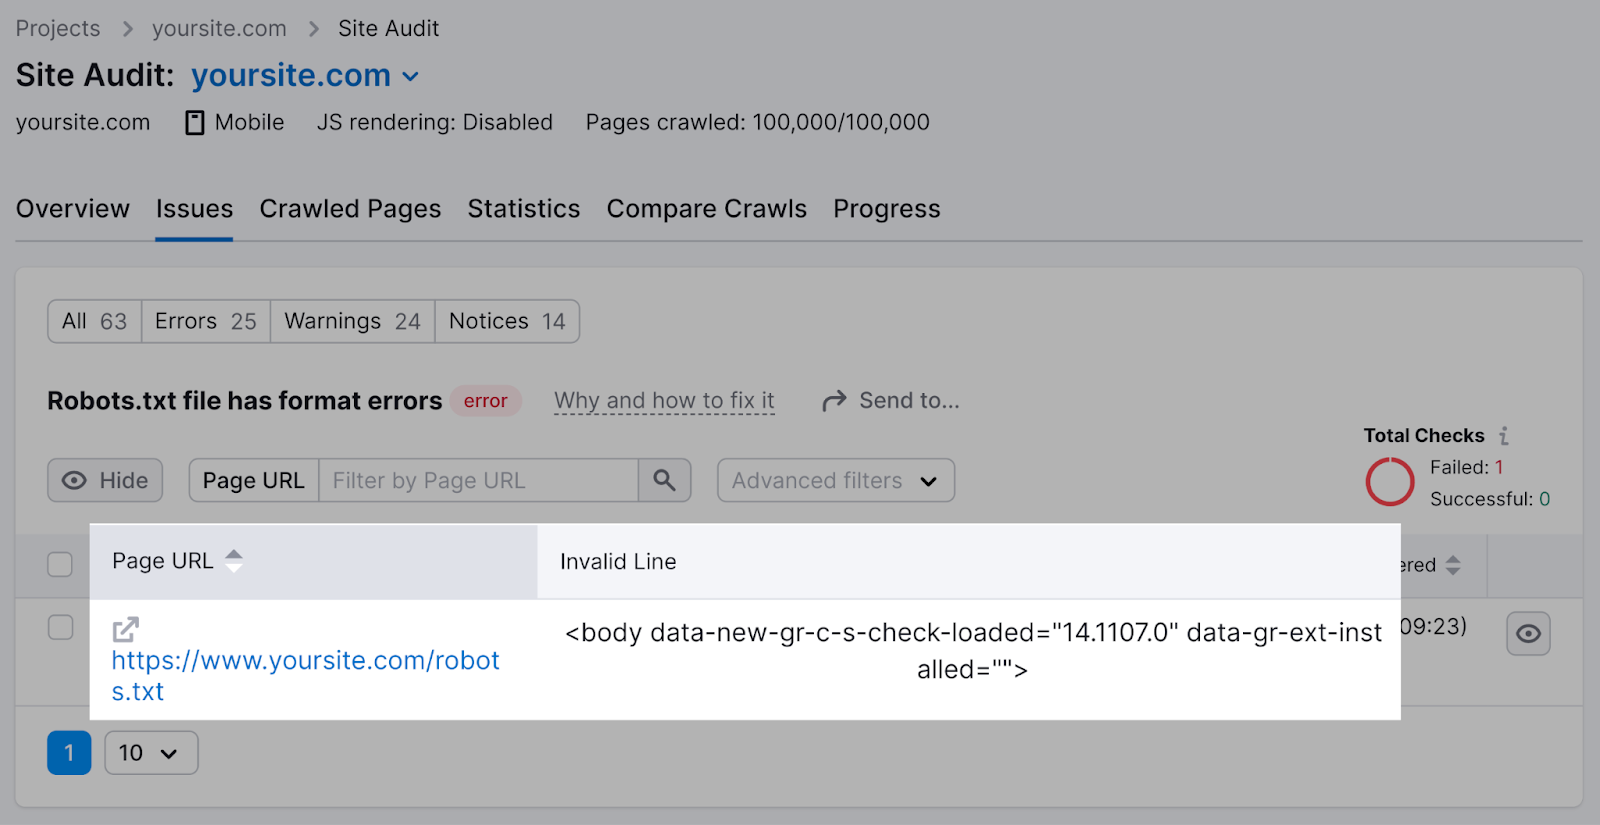
You’ll see a list of invalid lines.
You can click “Why and how to fix it” to get specific instructions on how to fix the error.
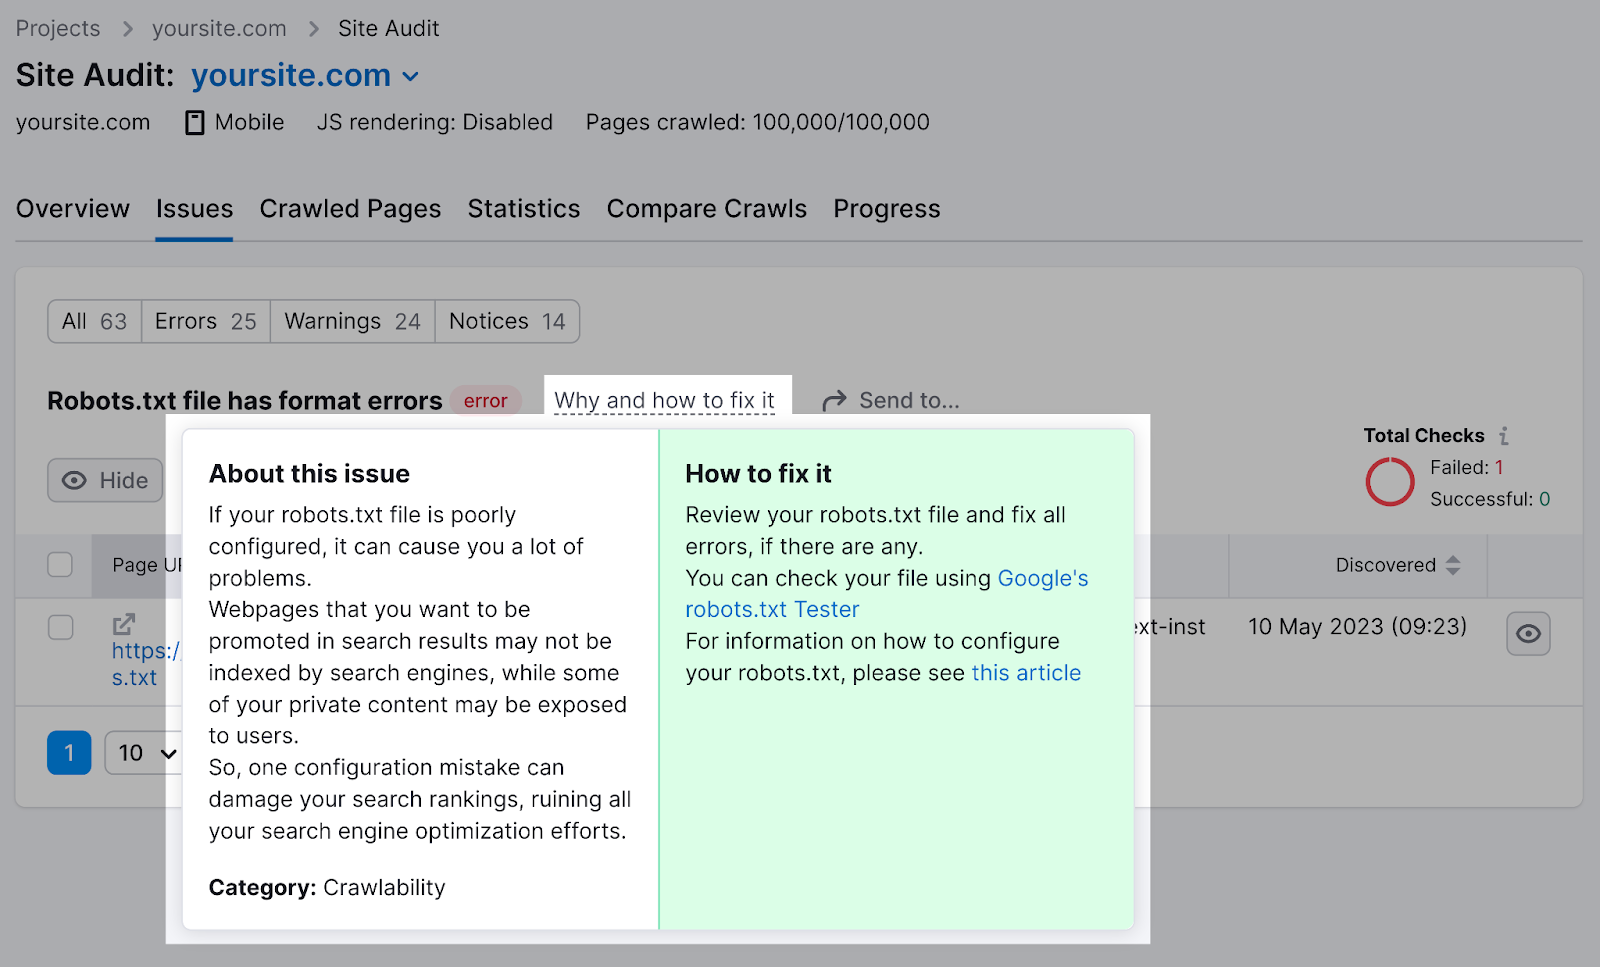
Checking your robots.txt file for issues is important, as even minor mistakes can negatively affect your site’s indexability.
Robots.txt Best Practices
Use a New Line for Each Directive
Each directive should sit on a new line.
Otherwise, search engines won’t be able to read them. And your instructions will be ignored.
Incorrect:
User-agent: * Disallow: /admin/
Disallow: /directory/Correct:
User-agent: *
Disallow: /admin/
Disallow: /directory/
Use Each User-Agent Only Once
Bots don’t mind if you enter the same user-agent multiple times.
But referencing it only once keeps things neat and simple. And reduces the chances of human error.
Confusing:
User-agent: Googlebot
Disallow: /example-page
User-agent: Googlebot
Disallow: /example-page-2
Notice how the Googlebot user-agent is listed twice?
Clear:
User-agent: Googlebot
Disallow: /example-page
Disallow: /example-page-2
In the first example, Google would still follow the instructions. But writing all directives under the same user-agent is cleaner and helps you stay organized.
Use Wildcards to Clarify Directions
You can use wildcards (*) to apply a directive to all user-agents and match URL patterns.
To prevent search engines from accessing URLs with parameters, you could technically list them out one by one.
But that’s inefficient. You can simplify your directions with a wildcard.
Inefficient:
User-agent: *
Disallow: /shoes/vans?
Disallow: /shoes/nike?
Disallow: /shoes/adidas?Efficient:
User-agent: *
Disallow: /shoes/*?
The above example blocks all search engine bots from crawling all URLs under the “/shoes/” subfolder with a question mark.
Use ‘$’ to Indicate the End of a URL
Adding the “$” indicates the end of a URL.
For example, if you want to block search engines from crawling all .jpg files on your site, you can list them individually.
But that would be inefficient.
Inefficient:
User-agent: *
Disallow: /photo-a.jpg
Disallow: /photo-b.jpg
Disallow: /photo-c.jpg
Instead, add the “$” feature:
Efficient:
User-agent: *
Disallow: /*.jpg$The “$” expression is a helpful feature in specific circumstances like above. But it can also be dangerous.
You can easily unblock things you didn’t mean to, so be prudent in its application.
Use the Hash Symbol to Add Comments
Crawlers ignore everything that starts with a hash (#).
So, developers often use a hash to add a comment in the robots.txt file. It helps keep the file organized and easy to read.
To add a comment, begin the line with a hash (#).
Like this:
User-agent: *
#Landing Pages
Disallow: /landing/
Disallow: /lp/
#Files
Disallow: /files/
Disallow: /private-files/
#Websites
Allow: /website/*
Disallow: /website/search/*
Developers occasionally include funny messages in robots.txt files because they know users rarely see them.
For example, YouTube’s robots.txt file reads: “Created in the distant future (the year 2000) after the robotic uprising of the mid 90’s which wiped out all humans.”
And Nike’s robots.txt reads “just crawl it” (a nod to its “just do it” tagline) and its logo.
Use Separate Robots.txt Files for Different Subdomains
Robots.txt files control crawling behavior only on the subdomain in which they’re hosted.
To control crawling on a different subdomain, you’ll need a separate robots.txt file.
So, if your main site lives on “domain.com” and your blog lives on the subdomain “blog.domain.com,” you’d need two robots.txt files. One for the main domain's root directory and the other for your blog’s root directory.
5 Robots.txt Mistakes to Avoid
When creating your robots.txt file, here are some common mistakes you should watch out for.
1. Not Including Robots.txt in the Root Directory
Your robots.txt file should always be located in your site's root directory. So that search engine crawlers can find your file easily.
For example, if your website is “www.example.com,” your robots.txt file should be located at "www.example.com/robots.txt."
If you put your robots.txt file in a subdirectory, such as "www.example.com/contact/robots.txt," search engine crawlers may not find it. And may assume that you haven't set any crawling instructions for your website.
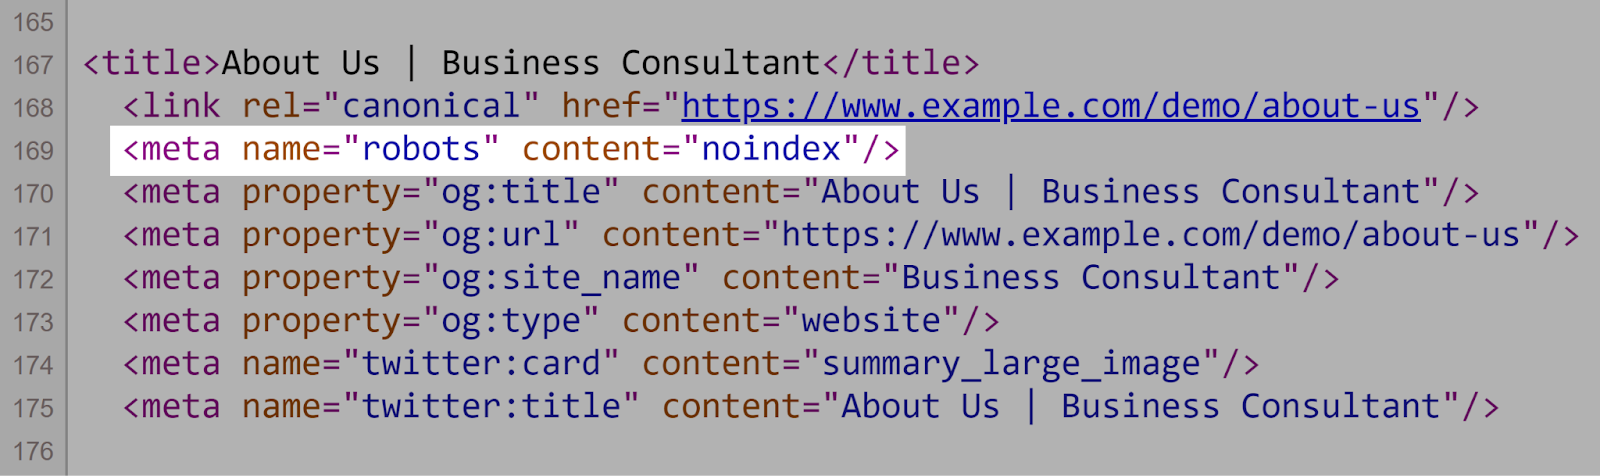
2. Using Noindex Instructions in Robots.txt
Robots.txt should focus on crawling directives, not indexing ones. Again, Google doesn’t support the noindex rule in the robots.txt file.
Instead, use meta robots tags (e.g., <meta name="robots" content="noindex">) on individual pages to control indexing.
Like so:
3. Blocking JavaScript and CSS
Be careful not to block search engines from accessing JavaScript and CSS files via robots.txt. Unless you have a specific reason for doing so, such as restricting access to sensitive data.
Blocking search engines from crawling these files using your robots.txt can make it harder for those search engines to understand your site's structure and content.
Which can potentially harm your search rankings. Because search engines may not be able to fully render your pages.
Further reading: JavaScript SEO: How to Optimize JS for Search Engines
4. Not Blocking Access to Your Unfinished Site or Pages
When developing a new version of your site, you should use robots.txt to block search engines from finding it prematurely. To prevent unfinished content from being shown in search results.
Search engines crawling and indexing an in-development page can lead to poor user experience. And potential duplicate content issues.
By blocking access to your unfinished site with robots.txt, you ensure that only your site's final, polished version appears in search results.
5. Using Absolute URLs
Use relative URLs in your robots.txt file to make it easier to manage and maintain.
Absolute URLs are unnecessary and can introduce errors if your domain changes.
❌ Here’s an example of a robots.txt file with absolute URLs:
User-agent: *
Disallow: https://www.example.com/private-directory/
Disallow: https://www.example.com/temp/
Allow: https://www.example.com/important-directory/
✅ And one without:
User-agent: *
Disallow: /private-directory/
Disallow: /temp/
Allow: /important-directory/
Keep Your Robots.txt File Error-Free
Now that you understand how robots.txt files work, it's important to optimize your own robots.txt file. Because even small mistakes can negatively impact your website's ability to be properly crawled, indexed, and displayed in search results.
Semrush's Site Audit tool makes it easy to analyze your robots.txt file for errors and get actionable recommendations to fix any issues.